Ever wondered how a simple splash of paint can completely reinvent the vibe of a room? DIY accent wall paint ideas have taken the decorating world by storm because they offer a budget-friendly, customizable way to add personality and style to any space. Whether you’re aiming for bold, modern patterns or soft, subtle textures, these projects empower you to transform your walls without the need for extensive renovations or professional help.
It’s all about making your space uniquely yours with a touch of creativity! In this article, you’ll find a treasure trove of inspiring ideas and practical tips to help you craft stunning accent walls that match your style and mood. From eye-catching geometric designs to elegant gradients, rustic faux finishes, and vibrant color palettes, there’s something for every taste and skill level.
Get ready to explore a variety of techniques that will turn your walls into captivating focal points—no fancy tools required! Transform your space with striking geometric shapes that bring a contemporary edge to any room. This technique is perfect for those looking to add a sense of structure and visual intrigue without overwhelming the space.
The clean lines and bold patterns instantly elevate a plain wall, creating a dynamic focal point that feels fresh and stylish. Imagine a crisp, white wall adorned with sharp, angular shapes in deep navy, soft blush, or metallic gold.
Using painter’s tape, you can carve out triangles, diamonds, or abstract polygons, giving the wall a layered, three-dimensional effect. The sharp lines contrast beautifully with the wall’s smooth surface, while the tactile sensation of the tape and fresh paint adds to the creative process.
The overall look is sleek, minimal, and incredibly modern, perfect for a living room or bedroom aiming for a chic aesthetic. Getting started is straightforward and budget-friendly.
First, choose your base wall color and let it dry completely. Then, sketch your geometric design with a pencil for guidance.
Apply painter’s tape along the edges of your shapes, ensuring each line is pressed down firmly. Paint inside the taped sections with your chosen colors, allowing each section to dry before removing the tape carefully to reveal crisp, geometric patterns. For an extra touch, add metallic accents or matte finishes to enhance the visual impact.
1. Striped Walls Using Different Paint Colors
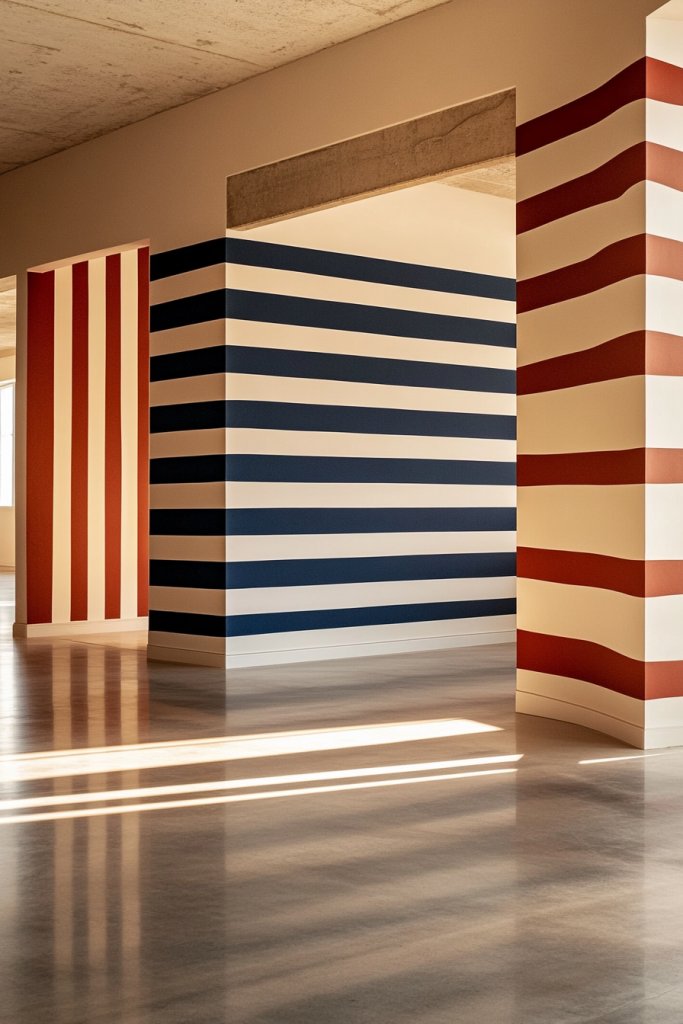
Stripes are a timeless way to add energy and sophistication to a room with simple, bold lines. Whether you prefer horizontal or vertical stripes, this idea offers endless versatility to customize your space with contrasting hues and playful patterns that can make your walls appear taller or wider.
Picture a wall painted with alternating stripes of deep emerald green and creamy beige, or bold black and bright white for a more striking look. The clean, parallel lines create a rhythmic pattern that guides the eye across the room, evoking both classic charm and modern flair.
The texture of the paint adds a subtle depth, especially when using matte or eggshell finishes, while the contrasting colors energize the entire space. This technique is as much about visual impact as it is about creating a vibrant, personalized backdrop.
To achieve this look, start by choosing two or more colors that complement your room’s decor. Use painter’s tape to mark out your stripe widths and ensure the lines are straight with a level.
Paint one color over the taped sections, let it dry, then apply tape over that area before painting the second color. Carefully peel off the tape once the paint is fully dry to reveal crisp, even stripes. For a more refined look, consider varying stripe widths or adding a metallic or glitter paint stripe for extra flair.
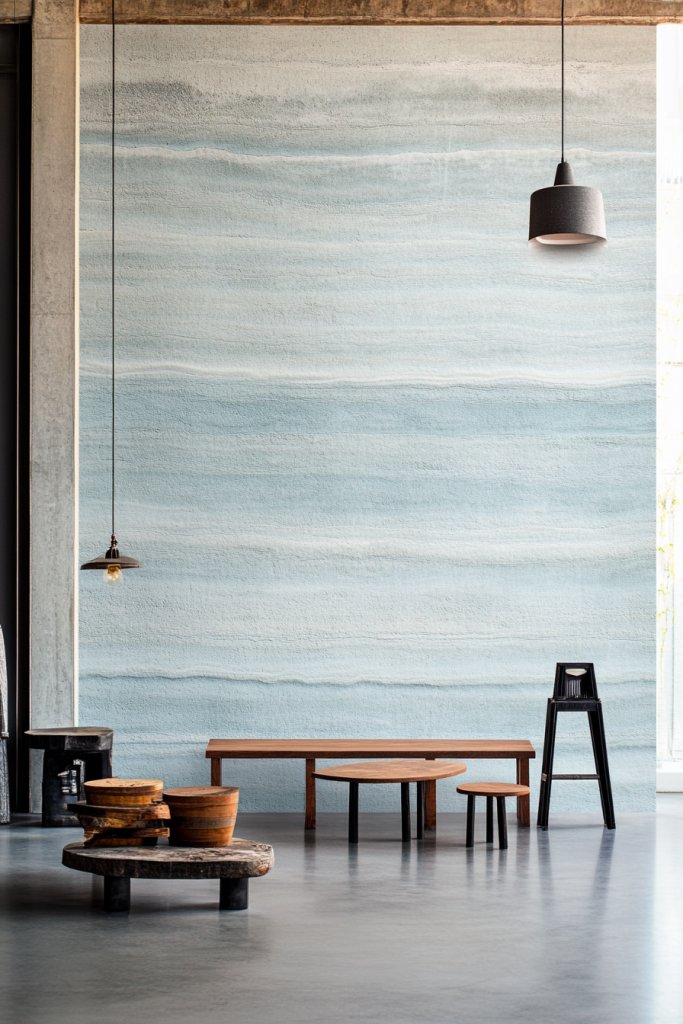
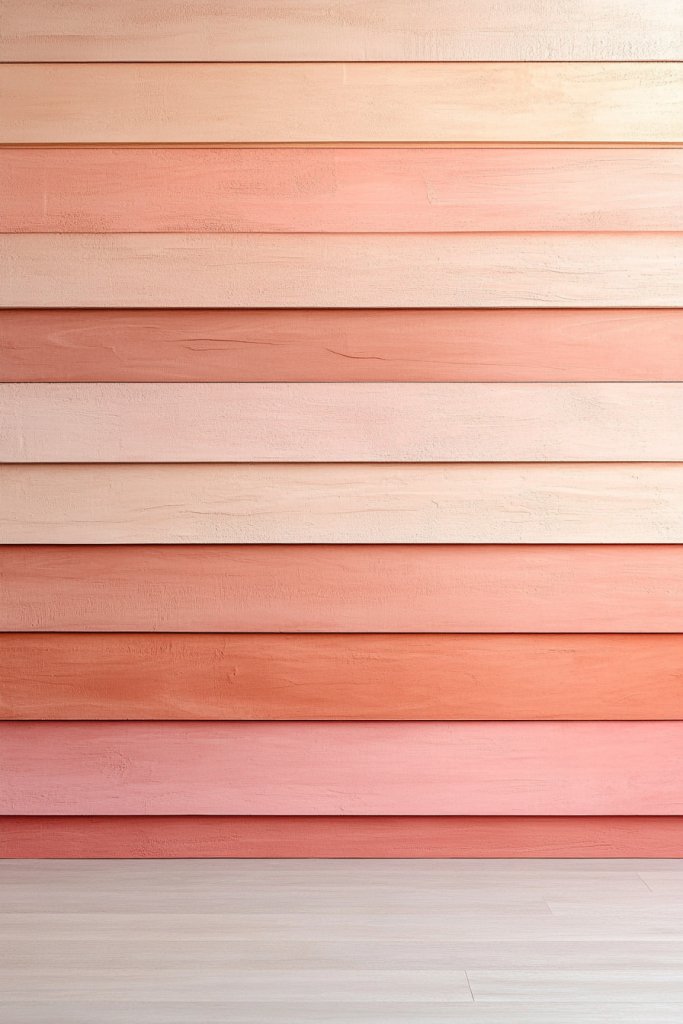
2. Ombre Gradient Walls for a Soft, Elegant Transition
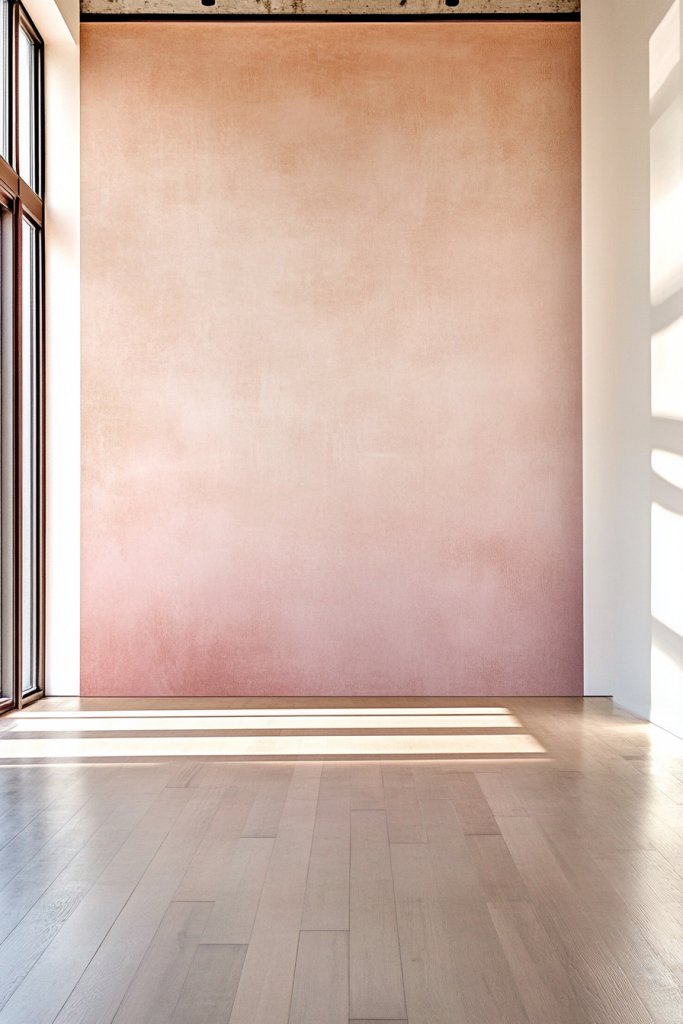
An ombre gradient wall creates a subtle, sophisticated transition between shades, infusing your room with a soothing, artistic vibe. This technique is perfect for those who want a gentle color shift that adds depth without overwhelming the senses, making it ideal for bedrooms, living rooms, or even bathrooms.
Visualize a wall that begins with a soft blush pink at the top, gradually blending into a warm terracotta at the bottom. The seamless gradient offers a calming, luxurious atmosphere, reminiscent of a sunset or watercolor painting.
The textured effect of the blending paint creates a soft visual movement, inviting relaxation and tranquility. The overall effect is elegant and understated, adding a layer of depth and personality to your space.
Creating an ombre effect is simpler than it looks. Start with your chosen light and dark shades—preferably in the same color family—and prepare your paints by diluting the darker shade with a bit of water or glaze.
Using a large, flat brush or sponge, blend the colors directly on the wall, starting from the top with the lighter hue, then gradually adding the darker shade and blending downwards. Work in sections and keep a clean, damp cloth nearby for quick corrections. Finish with a clear, matte sealer to lock in the soft transition and prolong the look.
3. Color Blocking with Large, Bold Panels
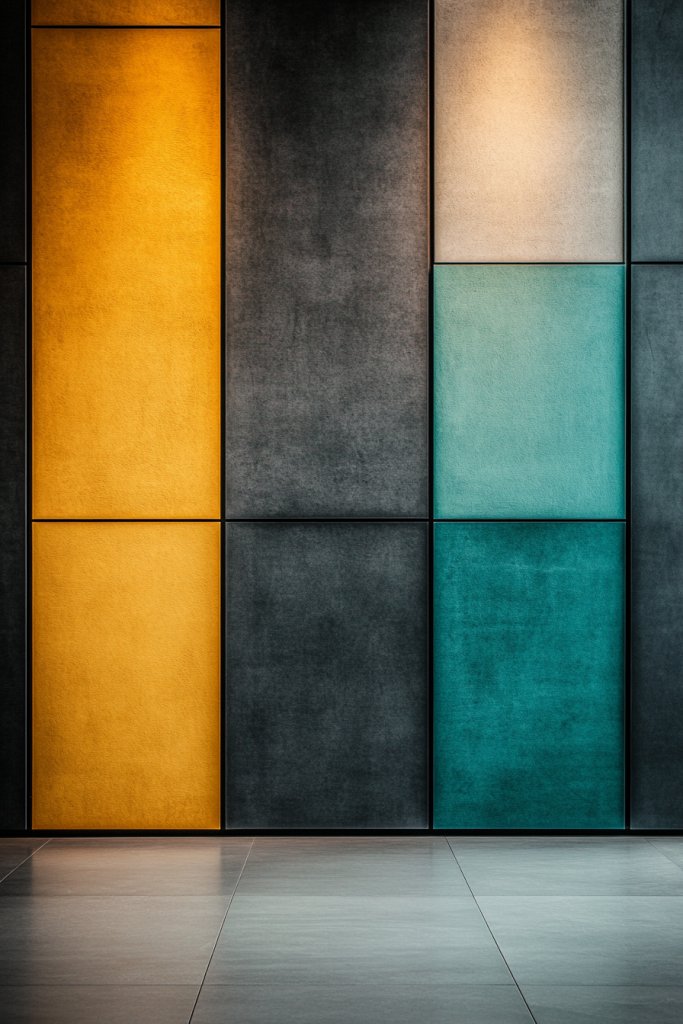
Color blocking introduces large, solid patches of contrasting colors that create a bold, minimalist statement on your wall. This approach emphasizes clean lines and geometric simplicity, perfect for modern or Scandinavian interiors seeking a dramatic yet uncluttered aesthetic.
Picture a wall divided into three horizontal sections: a deep charcoal at the bottom, a crisp white in the middle, and a vibrant teal at the top. The large blocks are sharply defined, with each color serving as a visual anchor that adds depth and dimension.
The interplay of matte and glossy finishes can further enhance the visual texture, while the simplicity of the design keeps the space feeling fresh and uncluttered. This technique is especially impactful in open-concept spaces or rooms with ample natural light.
Getting started involves measuring and marking your design on the wall with a pencil and level. Use painter’s tape to create straight, clean edges around each panel, then fill each space with your chosen colors—using high-quality interior paint for a smooth finish.
For added sophistication, consider layering different finishes or adding a metallic border between panels. Once dry, carefully remove the tape to reveal a striking, geometric canvas that transforms your room into a modern masterpiece.
4. Faux Wood Grain Effect for Rustic Charm
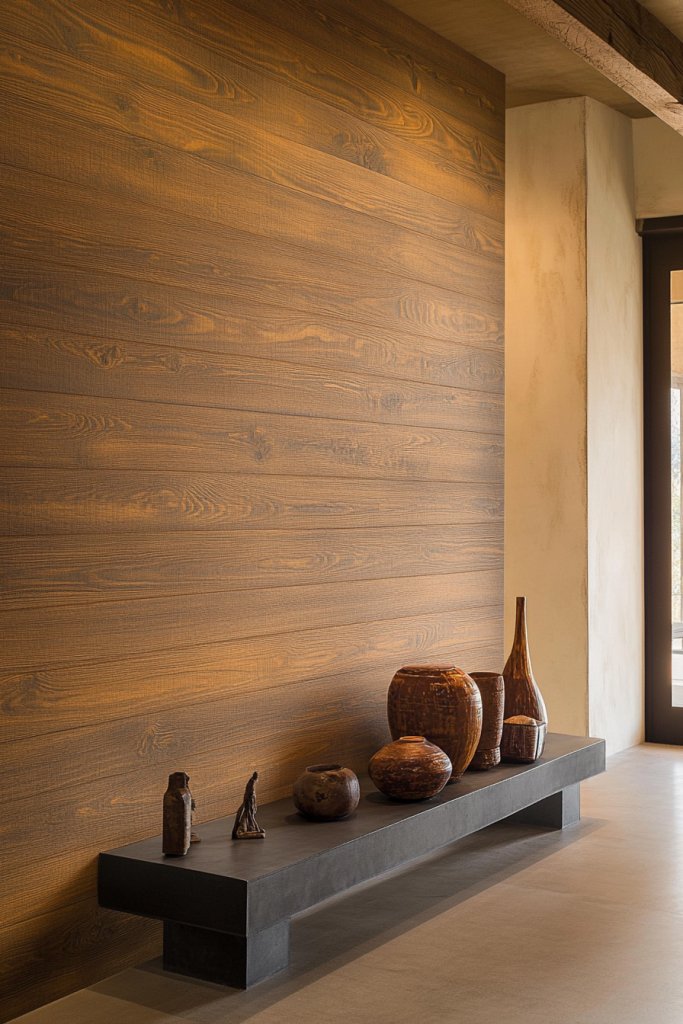
Achieve the warm, inviting texture of real wood with a faux wood grain painting technique that’s perfect for rustic, farmhouse, or coastal-inspired interiors. This method adds natural visual interest and depth, giving your wall a handcrafted, cozy feel without the expense or effort of actual wood paneling.
Visualize a wall with a soft, creamy background, overlaid with streaks and knots mimicking the natural grain of oak or pine. The textured look includes subtle variations in color, with darker streaks and knots adding authenticity.
The tactile sensation of the textured paint and the visual warmth of the faux wood make the space feel inviting and grounded, bringing a touch of nature indoors. The overall effect blends rustic charm with modern DIY craftsmanship, creating a unique feature that complements both casual and refined decor.
To create this look, start with a base coat in a neutral or light color. Use a dry brush or sponge to apply darker shades in irregular streaks, mimicking the natural grain pattern.
Add knots or imperfections with small brushes or sponges in darker tones. For realism, layer multiple shades, blending softly along the edges.
Finish with a matte or satin topcoat to seal your work. This project requires patience but yields a beautiful, textured accent wall that feels like a true piece of art.
5. Metallic or Pearl Finish for a Luxurious Touch
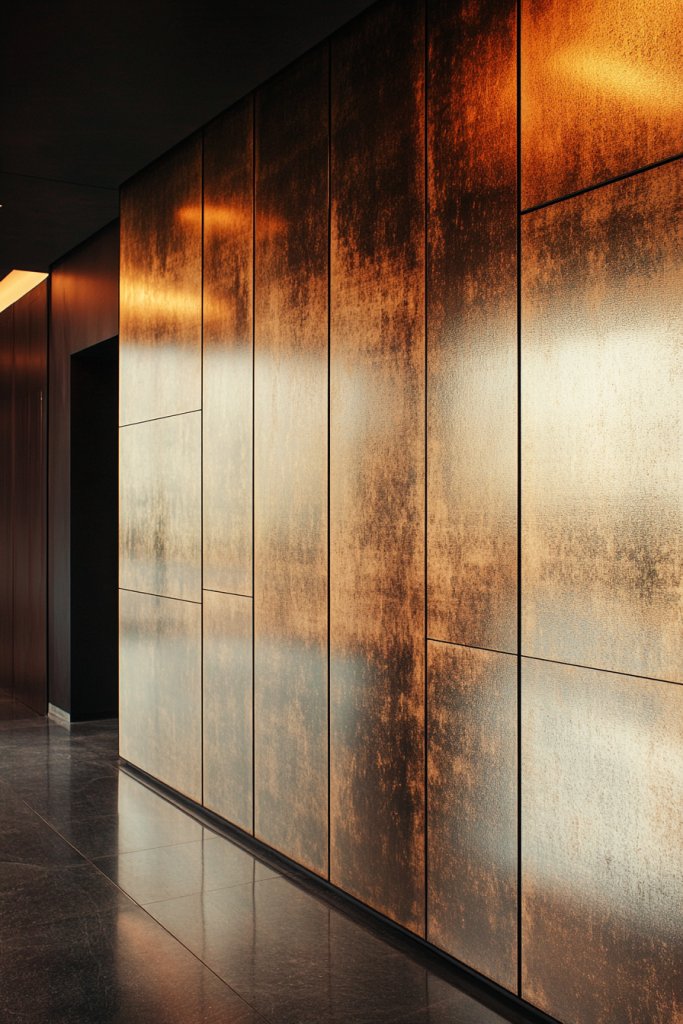
Adding a metallic or pearl finish to your accent wall instantly elevates the room’s elegance, creating a shimmering focal point that catches the light beautifully. This technique is perfect for those aiming for a sophisticated, high-end look that radiates opulence and style.
The subtle glow of a pearl sheen or the bold shimmer of metallic paints can transform a simple wall into a captivating feature that adds depth and glamour. Imagine a wall bathed in a soft, iridescent pearl hue that reflects the ambient light, giving the space a luminous quality.
Alternatively, think of a bold, metallic gold or silver that gleams with every movement, catching your eye as you enter the room. The finish feels smooth and velvety to the touch, with the reflective surface adding a sense of movement and richness.
These finishes work beautifully with minimalist furniture and elegant decor, making the entire room feel luxurious yet inviting. To achieve this look, start by selecting a high-quality metallic or pearl-effect paint, which can be found at most home improvement stores or online.
Prepare your wall by cleaning and priming it to ensure a smooth surface. Apply the paint with a roller or brush, working in even strokes to avoid streaks or uneven patches.
For extra shimmer, consider layering with a clear topcoat or adding a metallic foil for a more intense effect. Keep in mind that these paints dry quickly, so work in sections for best results, and always follow the manufacturer’s instructions for the perfect, luminous finish.
6. Stripes with Metallic Accents for a Glamorous Effect

Combining classic striped patterns with metallic accents creates a striking, glamorous accent wall that elevates any room’s decor. This design seamlessly blends timeless visual appeal with modern luxe details, perfect for adding a sophisticated edge to your space.
The shiny metallic stripes catch the light, adding sparkle and depth, making the room feel brighter and more expansive. Visualize bold, crisp stripes painted in rich colors like navy, emerald, or blush, accented with thin metallic gold or silver lines that shimmer subtly under the light.
The stripes can run horizontally or vertically, depending on your room’s layout, with the metallic accents acting as elegant separators or highlights. The textured contrast between matte paint and metallic finishes adds tactile interest, while the overall effect is both eye-catching and refined.
This style pairs well with plush textiles, mirrored furniture, or crystal accents for a truly luxe vibe. To create this look, first decide on your stripe width and color palette, then use painter’s tape to ensure clean, straight lines.
Paint the base color on the wall first, allowing it to dry thoroughly. Next, apply the metallic paint carefully along the tape lines using a fine brush or foam applicator for crisp edges.
Remove the tape while the paint is still tacky to avoid smudges. For added durability, seal the design with a clear matte or satin topcoat. With patience and attention to detail, you’ll achieve a stunning, glamorous feature wall that makes a statement.
7. Color Wash Technique for a Subtle, Textured Look
The color wash technique offers a soft, layered effect that adds depth and a gentle textured appearance to your accent wall. This method is ideal for creating a calming, sophisticated ambiance and works well with neutral or muted color palettes.
It’s a subtle way to introduce visual interest without overwhelming the space, perfect for those seeking a refined, understated elegance. Imagine walking into a room where the wall seems to gently shift in tone and texture, with delicate brush strokes blending shades of cream, taupe, or pastel.
The finish feels velvety and smooth, but up close, you notice a nuanced interplay of light and shadow that adds richness. This technique creates a sense of depth and dimension, making even simple color schemes look more layered and complex, ideal for eclectic or contemporary interiors.
To achieve this, start by choosing your base color, then dilute a darker or lighter shade with water or a glazing medium. Use a large, soft brush or sponge to apply the wash in broad, sweeping strokes, working in sections.
Blend the edges gently to avoid harsh lines and build up layers gradually for the desired depth. Wipe excess paint with a rag or sponge if needed, to soften the look.
Finish with a matte or satin sealant for longevity. This approachable DIY project offers a beautifully textured wall with minimal fuss and a high-end feel.
8. Two-Tone Walls with Contrasting Borders
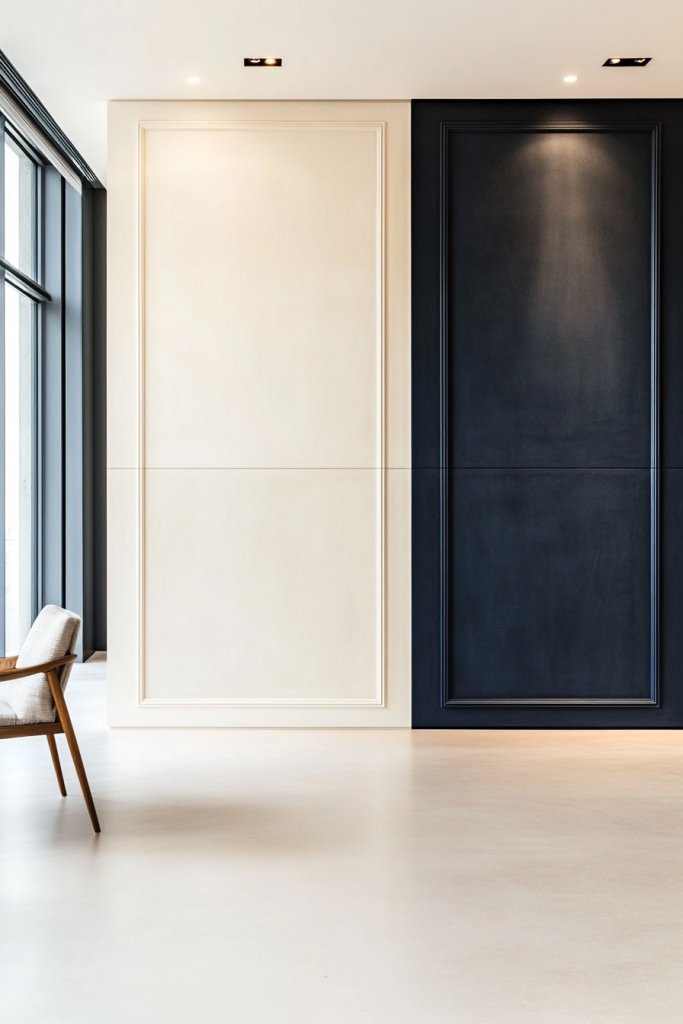
Creating a two-tone accent wall with contrasting borders is an easy way to add architectural interest and define space with clean, bold lines. This style lends a modern, polished look that can make your room appear taller or wider, depending on your color choices and border placement.
It’s a versatile technique that works in living rooms, bedrooms, or even hallways. Visualize a wall painted in two distinct shades—perhaps a soft gray on the upper half and a crisp white on the bottom—separated by a decorative molding or a painted border in a contrasting color like navy or metallic gold.
The border can be a simple line, a wide band, or a detailed trim, depending on your style preference. The transition creates a striking visual break that adds sophistication and dimension.
The contrasting colors and sharp lines bring a tailored, contemporary vibe, while the overall effect feels both cozy and refined. Getting started involves selecting your two main colors and a border or molding material.
Paint the top and bottom sections separately, using painter’s tape or a level to ensure straight, even lines. Attach any decorative border or molding securely, then paint over it for a seamless look.
Finish with a protective sealant if needed. This straightforward project can be customized with different color combinations or border styles, making it a perfect DIY upgrade that adds instant charm and visual impact.
9. Diagonal Lines for a Dynamic, Modern Style
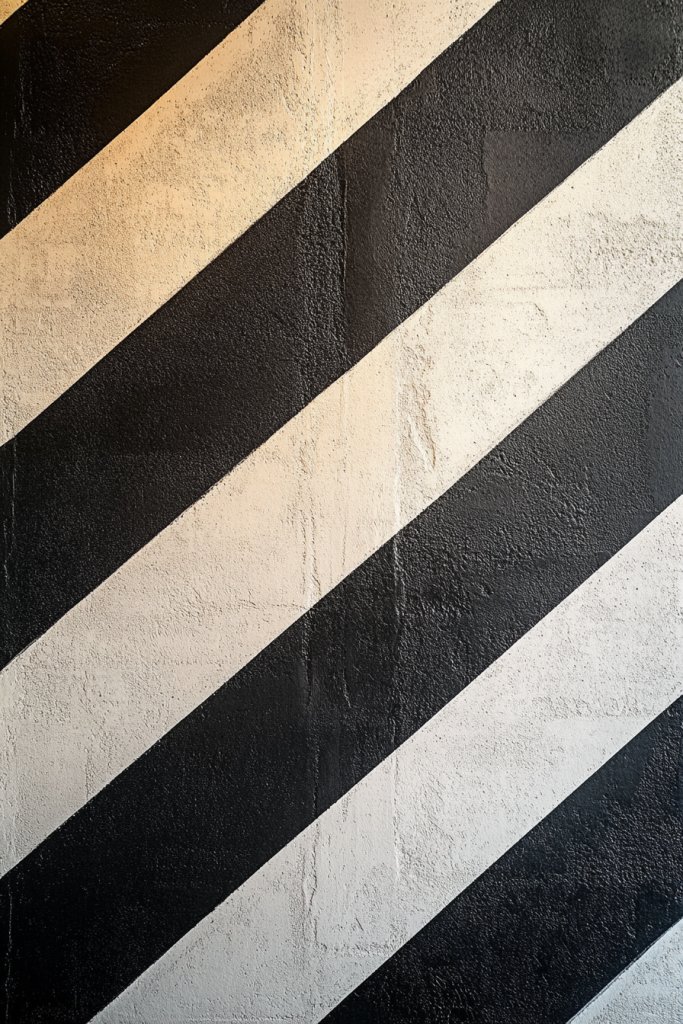
Adding diagonal lines to your accent wall instantly creates a bold, modern statement that energizes any space. This design introduces a sense of movement and visual intrigue, making your room feel more dynamic and engaging.
Imagine a wall painted with crisp, black diagonal stripes intersecting a soft, neutral background like warm beige or cool gray. The lines cut across the wall at sharp angles, emphasizing a geometric rhythm that draws the eye across the room.
The texture of the paint is smooth, while the clean lines give a polished, contemporary feel. When light hits the surface, the contrast between the colors enhances the sharpness of the angles, adding depth and dimension.
This straightforward yet striking pattern works well in living rooms, bedrooms, or home offices seeking a fresh, modern vibe. To create this look, start by choosing your base wall color and a contrasting hue for the diagonal stripes—common options include matte white with bold black or deep navy with soft pastels.
Use painter’s tape to mark out your diagonal lines, ensuring they are evenly spaced and straight. Use a level and measuring tape for precision, then carefully paint along the tape edges with a high-quality brush or roller.
Once dry, gently remove the tape to reveal sharp, clean lines. For an easier option, consider stencil kits designed for geometric patterns, or use painter’s tape in a crisscross pattern for added complexity.
10. Using Painter’s Tape for Intricate, Artistic Designs

Painter’s tape unlocks endless creative possibilities, allowing you to craft detailed patterns, stencils, or abstract shapes that turn your accent wall into a personalized work of art. This technique combines DIY accessibility with striking visual impact.
Visualize a wall decorated with delicate, interlocking geometric shapes or freeform abstract patterns in contrasting shades—think soft blush pink with crisp white or deep emerald with gold accents. The textured edges of the painted shapes pop against the smooth wall surface, adding depth and personality.
You might incorporate intricate motifs like chevrons, floral outlines, or layered triangles, all achieved with careful tape placement. The tactile quality of the painted designs, combined with the visual complexity, creates an engaging focal point that reflects your style.
The overall effect feels both curated and handcrafted, adding a unique charm to your space. Getting started is straightforward: first, sketch your design lightly with a pencil or chalk for guidance.
Use painter’s tape to carefully outline your shapes, ensuring edges are firmly pressed down to prevent bleeding. Fill in each shape with your chosen paint color, using a small brush for precision.
For multi-layered designs, let each color dry fully before applying the next. Once finished, peel away the tape gently to reveal sharp, professional-looking lines.
For added depth, consider layering different shades or adding metallic accents with a small foam brush. This method empowers you to create complex, artistic patterns—even if you’re a beginner—while customizing your space to reflect your personality.
11. Ombre Stripes for a Trendy, Colorful Transition
Ombre stripes blend colors seamlessly from light to dark or vice versa, delivering a sophisticated, layered look that energizes your room with vibrant color transitions. This technique adds depth and visual richness, perfect for creating a statement wall.
Picture a wall where soft blush pink gradually deepens into a rich coral, or a calming gradient from icy blue to navy, with each band of color gently fading into the next. The effect is smooth and harmonious, with a subtle shimmer if you choose metallic or satin paints.
The textured layering of colors invites viewers to explore the depth of the design, making the wall a focal point that radiates warmth and vibrancy. When illuminated by natural light, the colors seem to glow and shift, enhancing the ambient mood.
This style works beautifully in bedrooms, living rooms, or creative spaces looking for a lively yet elegant touch. To achieve this look, start by selecting a palette of three to five shades that blend well together.
Use painter’s tape to mark horizontal or vertical sections to keep the color transitions clean and even. Apply the lightest shade first at the top or bottom, blending the next darker shade into it while still wet for a seamless gradient.
Use a sponge or soft brush to blend the edges where the colors meet, creating a smooth transition. Repeat the process for each shade, ensuring each layer dries before adding the next. Finish by removing the tape carefully to reveal a stunning ombre stripe wall that’s both trendy and personalized.
12. Monochromatic Shades for a Cohesive, Calm Atmosphere
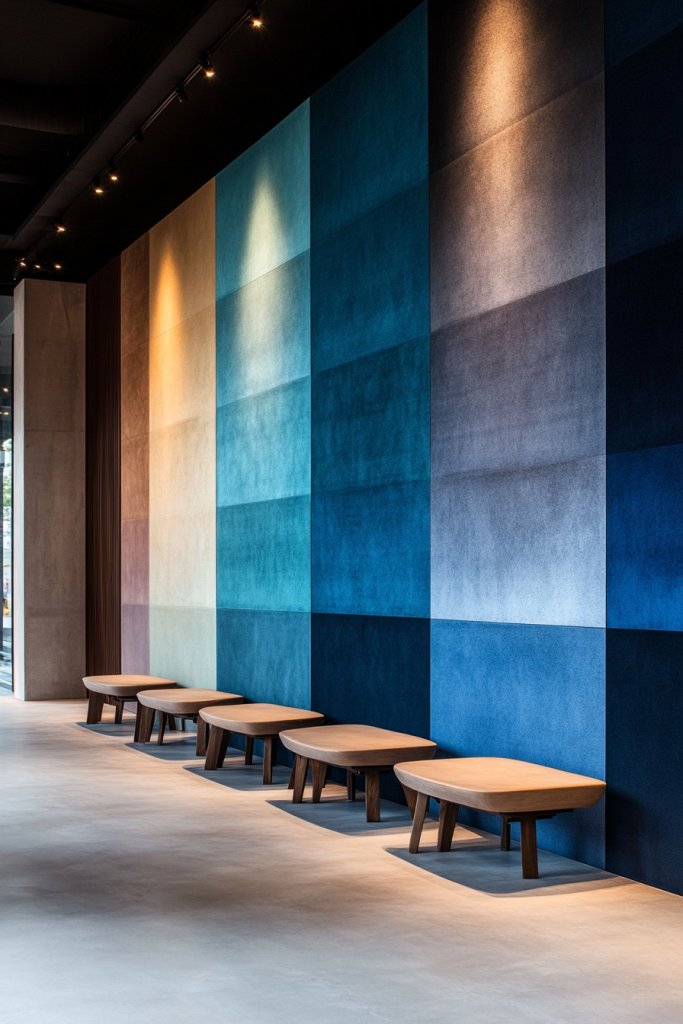
Using varying shades of a single color creates a harmonious, tranquil environment that feels both sophisticated and soothing. This approach allows for depth and visual interest without overwhelming the senses.
Envision a wall painted with a range of soft, muted blues—from icy pale to deep navy—creating a subtle gradient of tone. The varying shades add texture and dimension, making the wall feel layered and rich without introducing contrasting colors.
The overall effect is calming and cohesive, perfect for bedrooms, meditation spaces, or cozy living rooms. The textured surface, whether matte or eggshell finish, adds a tactile element that enhances the sense of serenity.
The monochromatic palette also makes it easy to incorporate different textiles and decor accents, like a plush throw or ceramics, to complete the tranquil aesthetic. To recreate this look, choose a dominant color and select three to five different shades within that color family.
Paint each section in a different shade, either in large blocks or in a gradient, using painter’s tape to define clean lines. Apply the paint with a roller or brush, working from light to dark shades, and feather the edges for a seamless transition.
Once dry, carefully remove the tape to reveal a unified, calming wall that enhances any space with its understated elegance. This technique is ideal for those seeking a subtle yet sophisticated design statement that promotes relaxation.
13. Faux Marble Effect for an Elegant, High-End Feel
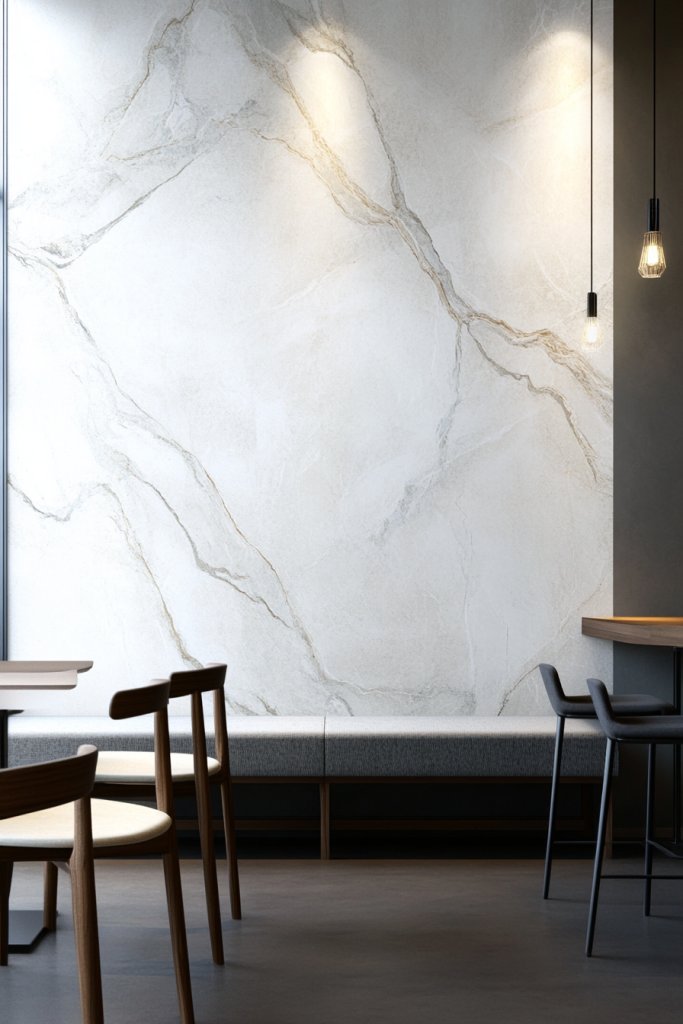
The faux marble technique transforms a plain wall into a luxurious surface reminiscent of high-end countertops or classic marble sculptures. With a few simple tools and paints, you can achieve a sophisticated look that elevates your entire room.
Imagine a wall with elegant, flowing veining in shades of gray, white, and gold—each stroke mimicking the natural patterns found in marble. The surface feels smooth and polished, with subtle variations that give it depth and realism.
The colors can be customized to match your decor, from cool monochrome tones to warm, earthy hues. When finished, the wall exudes a sense of luxury and refinement, making your space feel like a designer showcase.
The textured veining contrasts beautifully with matte or semi-gloss backgrounds, creating a striking visual impact that catches everyone’s eye. Begin by painting your base coat in a light, neutral color—white or soft gray works well.
Use a sponge or fine brush to add veining in darker shades, gently swirling and layering to mimic natural marble patterns. For added realism, incorporate fine gold or metallic accents with a brush or a metallic pen.
Once dry, lightly blend the veining edges for a seamless appearance. Seal the design with a clear matte or semi-gloss topcoat for durability and a polished finish. This DIY project is accessible with patience and offers a high-end look that transforms your wall into a statement piece of art.
14. Rainbow Palette for a Playful, Vibrant Space
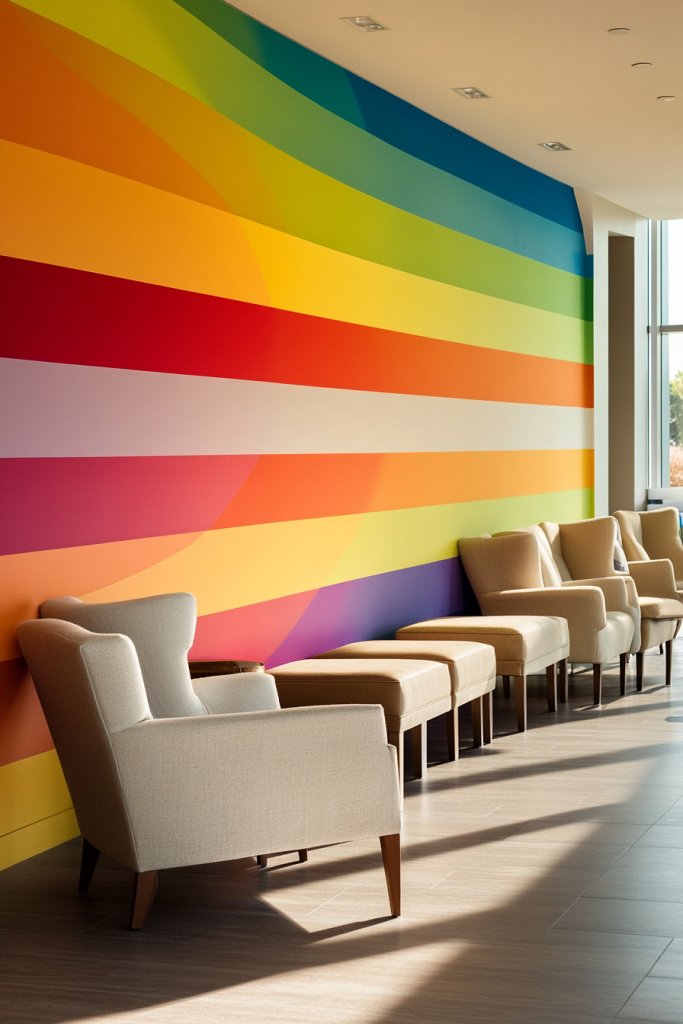
A rainbow palette instantly injects fun, energy, and a sense of joy into any room, making it perfect for those looking to create a lively, cheerful accent wall. This idea transforms a plain space into a vibrant focal point that sparks positivity and creativity.
Imagine a wall adorned with bold, colorful stripes or sections, each hue flowing seamlessly into the next—think fiery reds, sunny yellows, lush greens, vibrant blues, and playful purples. The colors can be arranged in a traditional rainbow sequence or in a more eclectic, random pattern for a whimsical feel.
The textures are typically smooth, with the paint’s glossy or semi-matte finish catching the light and emphasizing the bright colors. When finished, the wall radiates energy, making the room feel more playful and inviting—perfect for children’s rooms, creative spaces, or lively living areas.
To recreate this look, start by selecting a palette of 4-6 vibrant colors that complement your existing decor. Use painter’s tape to create clean, even stripes or blocks—measure and mark your sections for precision.
Apply high-quality, low-VOC acrylic or latex paints to ensure smooth color application and easy cleanup. For a softer look, you can opt for pastel versions of these shades or use a semi-gloss finish for extra pop.
Once the paint dries, carefully remove the tape to reveal crisp, colorful lines. Finish with a clear sealant if desired for added durability and a polished look.
15. Textured Matte Finish for a Cozy, Subtle Look

A textured matte finish offers a warm, inviting aesthetic that adds depth and subtlety to your accent wall, creating a cozy atmosphere perfect for relaxing spaces like bedrooms or living rooms. This finish balances visual softness with tactile interest, making it a timeless choice.
Picture a wall with a velvety matte surface, enhanced with gentle, handcrafted texture—perhaps a subtle stucco or a lightly embossed pattern that catches light differently throughout the day. The muted, non-reflective surface absorbs light softly, giving the room a calm, sophisticated vibe.
The textured matte finish feels warm and inviting to the touch, evoking comfort and tranquility—ideal for creating a serene retreat within your home. The overall look is understated yet rich, blending seamlessly with a variety of decor styles from modern minimalism to rustic charm.
To achieve this look, start with a high-quality matte wall paint, preferably with added texture medium or sand for tactile interest. Prepare your wall by cleaning and priming it thoroughly to ensure smooth application.
Use a roller or sponge brush to apply the textured paint, working in sections to maintain control over the pattern’s consistency. For more pronounced textures, you can add joint compound or plaster before painting and then lightly sand the surface for a refined finish.
Once dry, consider applying a clear matte sealant to protect the surface and enhance the textured effect. This approach creates a subtle, cozy backdrop that feels both stylish and welcoming.
Conclusion
With so many creative DIY accent wall paint ideas—from bold geometric patterns and striking stripes to elegant ombres and textured finishes—there’s a perfect project for every style and skill level. These techniques empower you to transform any space into a personalized masterpiece, adding character and charm without the need for professional help.
Don’t hesitate to experiment and make your room uniquely yours—every brushstroke brings your vision closer to reality. Start painting and watch your space come alive with style and personality!
Leave a Reply