Ever wonder how teenage girls turn their bedrooms into personalized havens that perfectly blend style and function? DIY room decor has skyrocketed in popularity among teens because it offers a creative, budget-friendly way to express individuality while solving common space challenges. From crafting unique wall art to clever storage hacks, DIY projects empower teens to design spaces that feel truly their own—without breaking the bank.
In this article, you’ll find a treasure trove of inspiration and practical ideas to elevate any teen girl’s room. Whether you’re looking to maximize space, add pops of color, or incorporate trendy touches, these DIY decor tips cover a wide variety of creative solutions. Get ready to transform your room into a stylish and functional retreat that reflects your personality and makes every inch work for you!
1. Multi-Functional Wall Shelves for Maximized Storage and Style
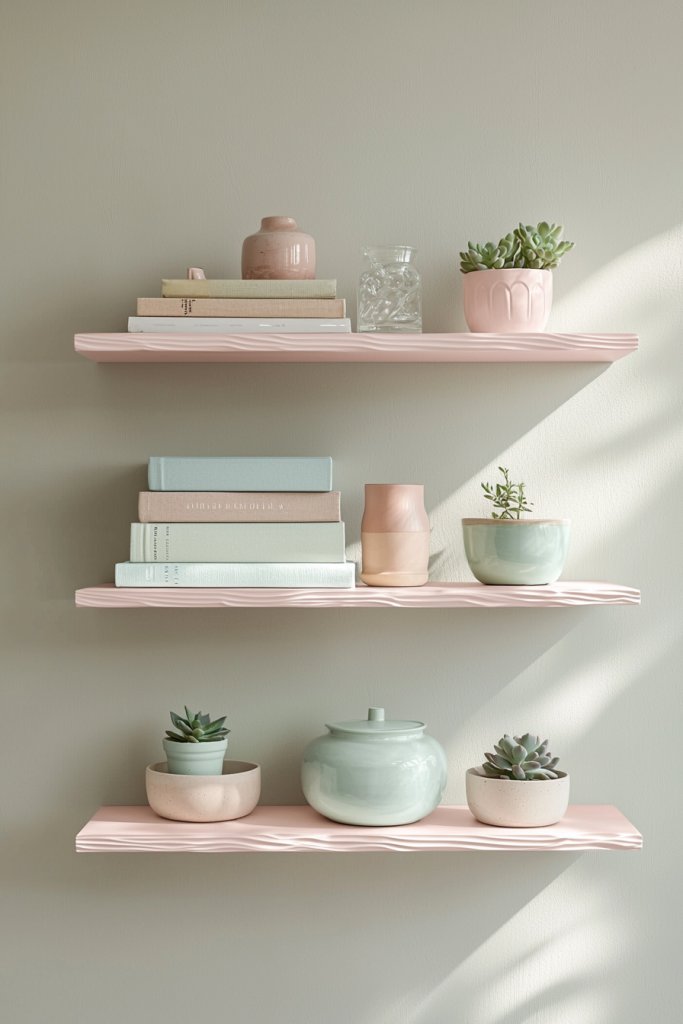
Are you tired of cluttered spaces and missing storage? Multi-functional wall shelves are a game-changer for teenage girls seeking both organization and style in their rooms. These versatile shelves help maximize vertical space while adding a decorative touch that reflects personal flair.
Imagine sleek, floating shelves painted in soft pastel hues like blush pink or mint green, mounted neatly on a wall painted in a neutral tone. They hold a mix of curated items—like a stack of favorite books, tiny potted succulents, or decorative ceramics—adding visual interest without overcrowding. The textured wood or painted MDF surfaces create a modern, minimalist feel, while the open design invites colorful accessories and personal trinkets to be displayed. The overall look is airy, personalized, and functional, transforming an often-overlooked wall into a statement piece.
To create your own multi-functional shelves, start with pre-made floating shelf brackets or build simple wooden planks using pine or MDF boards cut to your desired length. Sand and paint or stain the wood to match your room’s color scheme. Mount the shelves securely using appropriate wall anchors, especially if you plan to hold heavier items. Style them with your favorite accessories—think candles, framed photos, or small plants—keeping it balanced and clutter-free. This DIY project is beginner-friendly and can be customized easily to suit any space or style.
2. DIY Pegboard Organizer for Creative Space Saving and Display

A DIY pegboard organizer is an inventive way to keep small items tidy while adding an industrial-chic vibe to a teen’s room. This project turns blank wall space into a customizable storage solution that’s both practical and visually appealing.
Visualize a large, square or rectangular pegboard painted in a vibrant color like coral or turquoise, mounted above a desk or dressing area. It’s dotted with an array of hooks, baskets, and clips holding jewelry, hair accessories, stationery, or even small decorative items. The textured surface of the pegboard contrasts beautifully with soft textiles or smooth painted walls, creating a lively focal point. The open design allows for quick access to essentials, and the ability to rearrange hooks and containers makes it adaptable over time. The overall aesthetic is playful, organized, and personal.
To make your own pegboard organizer, purchase a wood or metal pegboard from any hardware store. Cut it to size if needed and paint it with spray paint or acrylics in your preferred color. Attach it securely to the wall using wall anchors and screws. Use S-Hooks, small baskets, or clips to hang accessories or tools. For added style, incorporate decorative washi tapes or stickers around the edges. This simple project enhances both function and decor, making everyday organization a fun part of your room makeover.
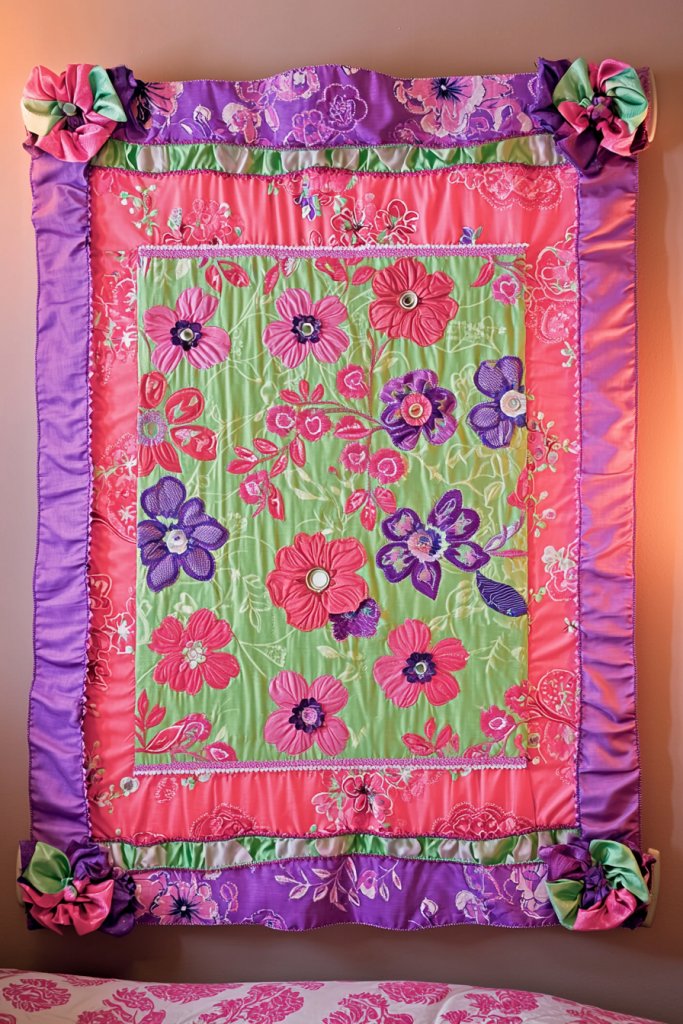
3. Customized Fabric Wall Banners to Add Color and Personal Flair
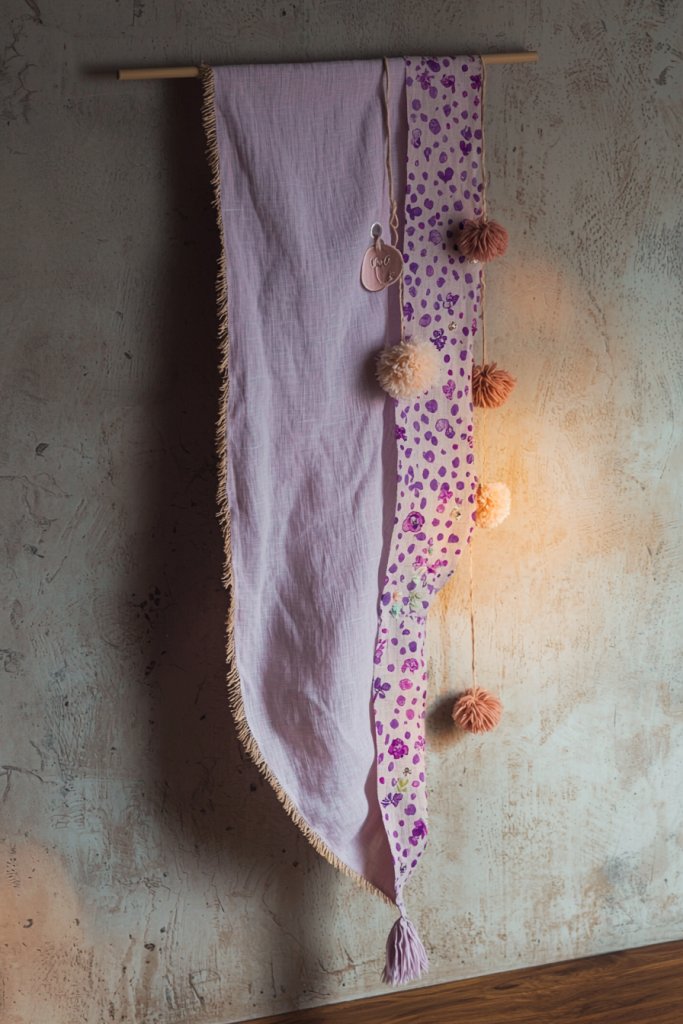
Adding a fabric wall banner is an easy way to introduce color, texture, and personality into any teen’s room decor. These DIY banners serve as a charming focal point that reflects individual style and can be tailored to any theme or color palette.
Picture a long, flowing banner made from soft, lightweight fabrics like linen, cotton, or burlap in shades of lavender, blush, or vibrant patterns like florals or polka dots. The edges are finished with decorative stitching or tassels, and the banner hangs from a simple wooden dowel or a piece of twine. It drapes gently against the wall, creating a cozy, welcoming atmosphere. Embellishments like pom-poms, tassels, or embroidered initials add a layered, textured look, making the space feel vibrant and personalized. The visual impact is warm, playful, and inviting, perfect for a teen’s bedroom retreat.
To craft your own fabric banner, gather fabric in your chosen colors or patterns, a wooden dowel or sturdy branch, and twine or ribbon for hanging. Cut the fabric into strips or shapes, then sew or glue decorative elements like pom-poms or tassels onto the edges. Attach the fabric to the dowel using small clips or tying with string, then hang it on the wall with command hooks or nails. This project requires minimal sewing skills and can be customized endlessly—ideal for adding a personal touch to your teen’s space.
4. Upcycled Crate Storage Units for Clutter-Free Space and Rustic Charm
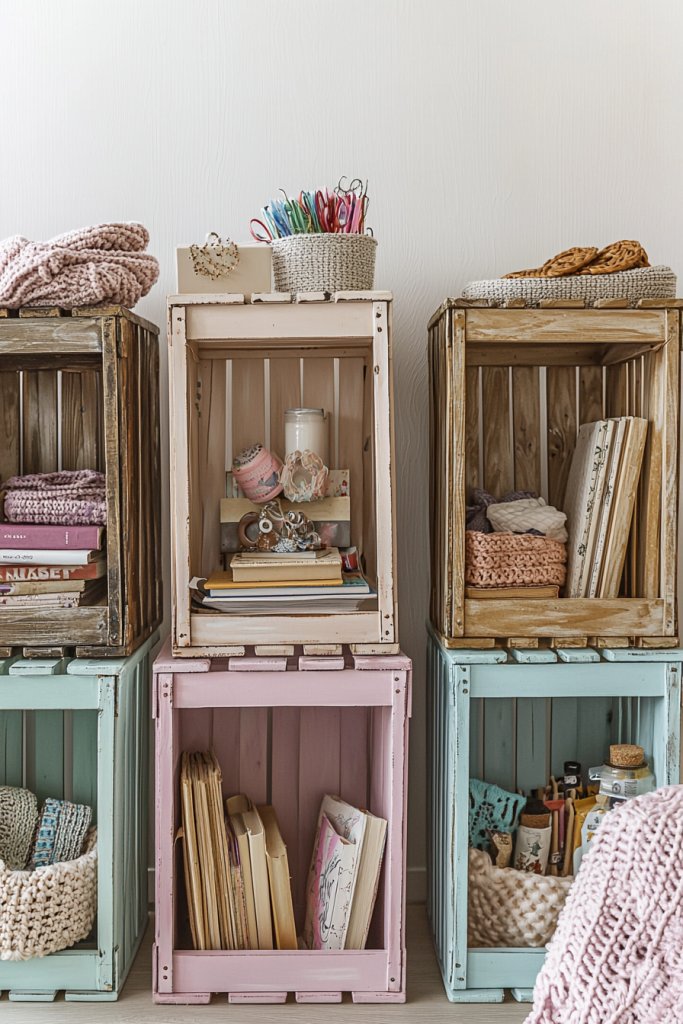
Upcycled crates are a stylish, eco-friendly way to organize and decorate a teen’s room, blending rustic charm with practical storage. They’re perfect for creating custom shelving or storage cubbies that add warmth and personality to any space.
Imagine a set of vintage wooden crates stacked or arranged side by side, painted in pastel shades or left in their natural wood finish for a rustic look. Inside, they hold everything from books and snacks to jewelry or craft supplies. The open-front design makes items easy to access, while the varied heights add visual interest. The textured wood combined with soft textiles like crochet throws or plush cushions transforms the crates into cozy, functional decor pieces. This setup not only tidies up clutter but also creates a charming focal point that feels both homey and stylish.
Start by sourcing secondhand wooden crates from flea markets, thrift stores, or online marketplaces. Clean and sand the wood to remove splinters and paint or stain in your preferred colors. Arrange the crates into a vertical tower or a horizontal row, securing them with screws if needed for stability. Decorate the top or inside with fabric liners, fairy lights, or small plants for extra personality. These upcycled crates are budget-friendly, versatile, and a fantastic way to add rustic charm while keeping your room organized.
5. Hanging String Lights with DIY Paper Lanterns for Cozy Ambiance
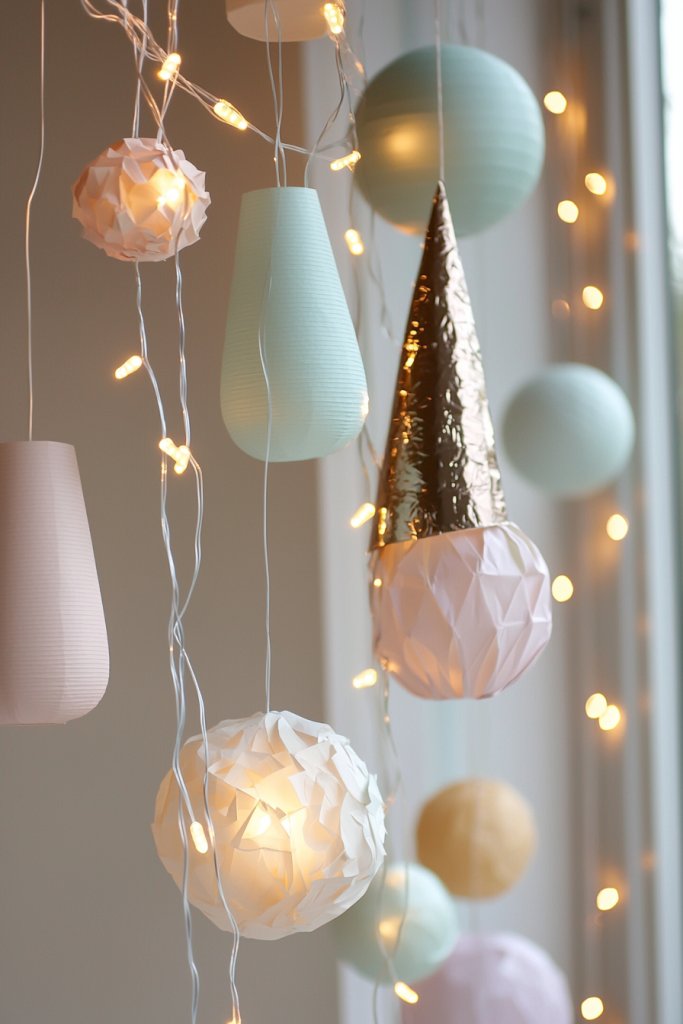
String lights paired with DIY paper lanterns create a magical, cozy atmosphere perfect for relaxing or entertaining. This combination adds a warm, inviting glow that transforms any teen’s room into a dreamy retreat.
Picture delicate, warm-white fairy lights draped across the ceiling or along a wall, intertwined with handmade paper lanterns in soft pastel or metallic finishes. The lanterns are crafted from simple materials like tissue paper, colored paper, or even recycled materials—shaped into spheres, cones, or star forms—hanging at different heights for a whimsical effect. When lit, they cast a gentle, diffused light that softens the room’s ambiance, making it feel warm and snug. The visual is enchanting, playful, and perfect for creating a relaxing vibe or a special mood for sleepovers or study nights.
To make your own paper lanterns, gather tissue paper, string, and glue or tape. Shape the lanterns using balloons or wireframes as forms, applying layers of tissue paper with adhesive to create a textured exterior. Once dry, attach the lanterns to the fairy lights with thin wire or fishing line. Hang the string lights with command hooks or hooks on the ceiling or wall, then hang your lanterns at varying heights for a dynamic look. This easy DIY project adds a personalized glow to your space and is perfect for special occasions or everyday coziness.
6. Personalized Mirror Frames with Decorative Tape or Paint
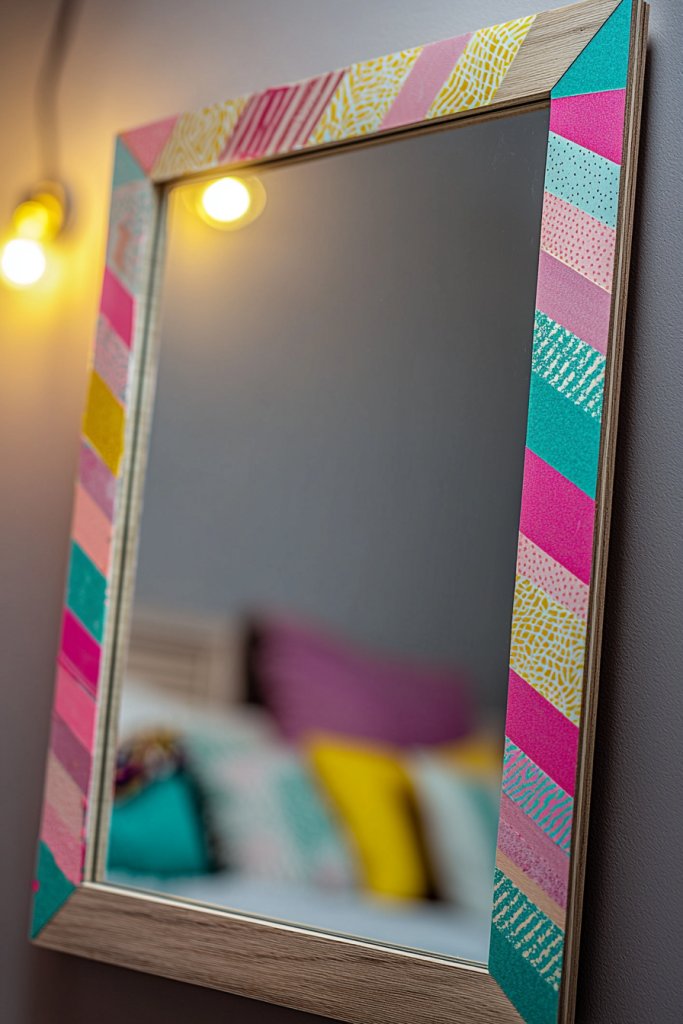
Adding a personalized touch to your mirror is a simple way to enhance your room’s style while making it uniquely yours. Customizing the frame with decorative tape or paint allows for endless creative possibilities, turning a functional item into a statement piece that reflects your personality and style.
Imagine a sleek, rectangular mirror with a frame adorned with bold, colorful washi tape arranged in geometric patterns or playful stripes. Alternatively, you could use acrylic paint to craft delicate floral designs or abstract patterns directly onto a plain wooden or plastic frame. The finished look can range from minimalist chic with metallic accents to vibrant, eclectic styles with bright colors. The textured tape or painted details add visual interest and a tactile element, elevating the entire space with a personalized touch. The mirror not only helps with daily routines but also acts as a focal point that showcases your artistic flair.
Getting started is easy and budget-friendly. First, remove the mirror from its frame if possible, or work directly on it if not. Choose your decorative tape—think washi, duct, or patterned masking tape—or gather acrylic paints, brushes, and stencils. Tape off sections for clean lines or freehand your design for a more organic look. For painted frames, apply a primer if needed, then carefully paint your chosen design, allowing each layer to dry thoroughly. Reassemble the mirror and hang it in a spot where it reflects your personality and brightens your room.
7. Space-Saving Under-Bed Storage Drawers with Stylish Covers

Maximizing bedroom storage without sacrificing style is a common challenge, and under-bed drawers are a perfect solution. When combined with stylish covers, they turn an often-overlooked space into a chic, functional feature that keeps clutter out of sight.
Picture a neatly organized under-bed storage unit with sleek, fabric-covered drawers in soft pastel shades or bold patterns like stripes or florals. The covers can be customized with decorative trim, ribbon pulls, or even DIY painted labels for a personalized touch. The drawers slide smoothly on a clean, flat surface, holding everything from seasonal clothing to shoes or extra bedding. When closed, they create a clean, uncluttered look, while the fabric covers add a cozy, homey vibe to the room. The combination of practicality and style makes this solution perfect for small spaces or teen rooms with lots of stuff.
To create your own, measure the space under your bed to determine the size of your drawers. You can repurpose cardboard boxes or purchase inexpensive storage drawers from a home goods store. Wrap the boxes with your chosen fabric using a hot glue gun or fabric adhesive, ensuring smooth, tight coverage. Add decorative elements like ribbons or DIY painted labels to personalize each drawer. Finally, slide the finished boxes under your bed, and enjoy a clutter-free, aesthetically pleasing room that feels organized and inviting.
8. DIY Fabric-Covered Bulletin Boards for Organization and Decor
Transforming a plain corkboard into a stylish, functional decor piece is a fantastic way to stay organized while adding a pop of personality to your room. Covering it in fabric creates a soft, textured background that complements your existing decor and makes pinning notes, photos, or artwork more appealing.
Visualize a large square or rectangular bulletin board covered with a vibrant floral or geometric fabric in your favorite colors. The fabric is carefully stretched and glued around the edges, creating a smooth, seamless surface. You can add decorative touches like a fabric border, ribbon accents, or even sewn-on embellishments for extra flair. The finished board serves as a magnetic or pin-based gallery for reminders, inspirational quotes, or cherished photos, all framed in a cozy, tailored look. Its soft fabric background makes it more inviting and stylish than standard cork, blending seamlessly into a teen girl’s room decor.
To make your own, cut your chosen fabric slightly larger than the corkboard. Use a staple gun or hot glue to attach the fabric tightly around the back, folding the edges neatly for a clean finish. Add decorative trim or ribbon if desired. Mount the fabric-covered board on your wall using nails or adhesive strips, and start pinning your favorite memories or messages. This DIY project is simple, inexpensive, and allows you to showcase your personal style while keeping your space organized.
9. Creative Hanging Pocket Organizers for Small Items and Accessories

Hanging pocket organizers are a game-changer for keeping jewelry, makeup, or small accessories tidy and easily accessible. Their fun, functional design adds a charming decorative element to your room that also helps reduce clutter.
Picture a lightweight fabric organizer with multiple clear or patterned pockets hanging from a decorative rod or command hooks. Each pocket is perfect for storing earrings, hair ties, lip glosses, or other small essentials. Choose vibrant fabrics like tie-dye, polka dots, or pastel hues to match your room’s aesthetic. The transparent pockets allow you to see everything at a glance, making it easy to grab what you need while adding a playful, textured visual element to your wall. This setup is perfect for small spaces or creating a dedicated beauty corner with a cheerful, organized vibe.
Creating your own is straightforward. Cut fabric into strips to sew or glue into pockets, or purchase pre-made pocket organizers and customize them with fabric covers or decorative trims. Attach the pockets to a sturdy dowel, embroidery hoop, or a pre-stretched fabric panel, then hang on your wall. Fill the pockets with your favorite accessories, and enjoy a stylish, space-efficient storage solution that keeps your room looking fresh and clutter-free.
10. DIY Tassel Garland for a Fun, Textural Decor Accent
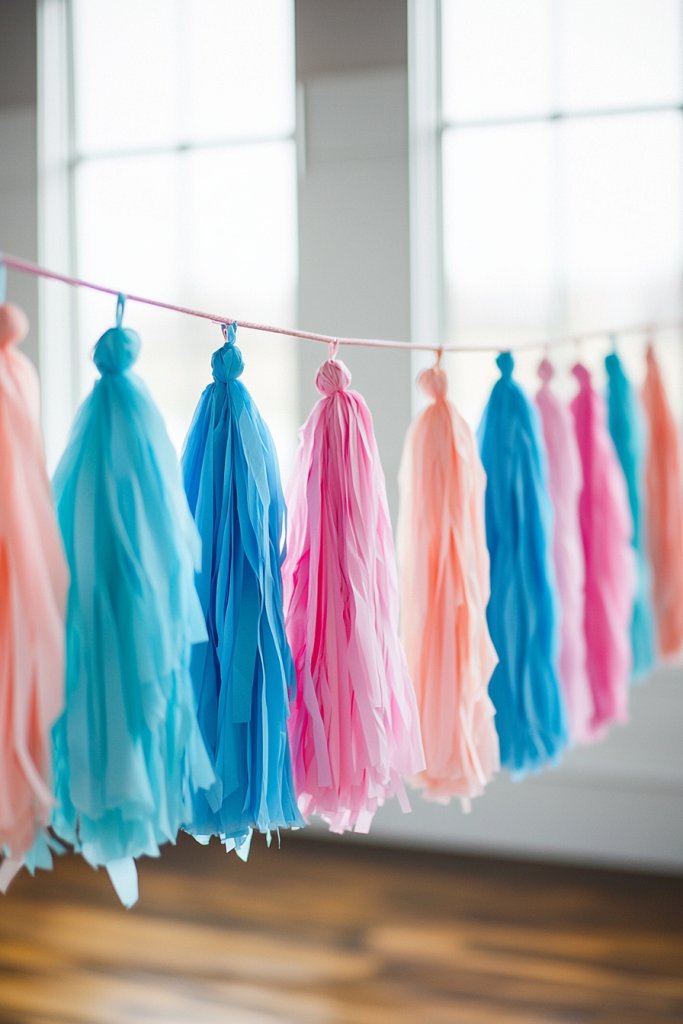
A tassel garland adds a lively, whimsical touch to any teen girl’s room, injecting color, movement, and texture into the space. It’s a versatile decor piece that can be hung over beds, windows, or along walls for instant visual impact.
Imagine a string of colorful tassels made from soft tissue paper, yarn, or fabric, each one fluttering gently with movement. The tassels come in a variety of shades—think blush pinks, pastel blues, or bright neons—creating a playful or sophisticated vibe depending on your color palette. The garland has a boho-chic look that complements a variety of room styles, from modern to eclectic. It adds a cheerful, festive feel to the room, perfect for celebrations or everyday decor.
Making your own is simple and affordable. Cut strips of tissue paper, yarn, or fabric into equal lengths, then tie or glue each tassel onto a length of twine or string. Space the tassels evenly to create a balanced look. You can customize by adding beads or charms between tassels for extra flair. Hang your finished garland across a wall, bed frame, or window, and enjoy an easy, cheerful decor upgrade that’s perfect for any teenage room.
11. Customizable Wall Decals Using Removable Vinyl for Style Flexibility
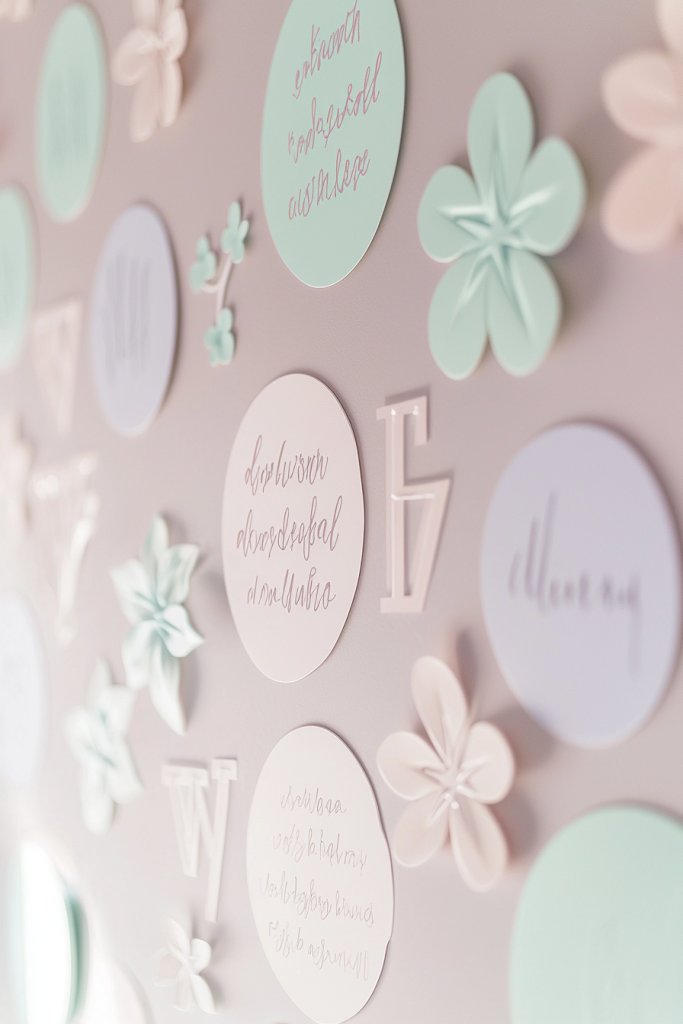
Transforming a teen girl’s room becomes effortless with customizable wall decals made from removable vinyl. These decals are a game-changer for those who love changing up their decor without damaging walls or committing to permanent designs. They offer an easy way to add personality, inspiration, or seasonal flair to any space, making the room feel fresh and personalized whenever desired.
Imagine a wall adorned with a series of delicate, hand-lettered quotes in soft pastel hues—like blush pinks, lavender, or mint—forming inspiring messages or fun patterns. The decals can include floral motifs, geometric shapes, or even custom initials, all with a matte finish that blends seamlessly into the wall surface. Because they’re removable, they won’t leave sticky residue or peel paint, and they can be repositioned or swapped out to match evolving tastes. This flexibility makes them perfect for a teen’s dynamic style and mood swings.
Getting started is simple: choose your favorite designs or create your own digital files through online design tools, then order custom decals from a craft or decal supplier. Clean the wall surface thoroughly with a damp cloth, peel the backing off the decal, and carefully apply it from one side to the other, smoothing out air bubbles with a credit card or squeegee. With just a few minutes of work, you’ll have a stunning, adaptable feature wall that reflects your teen’s unique style.
12. Mason Jar Wall Sconces for Light and Decorative Storage
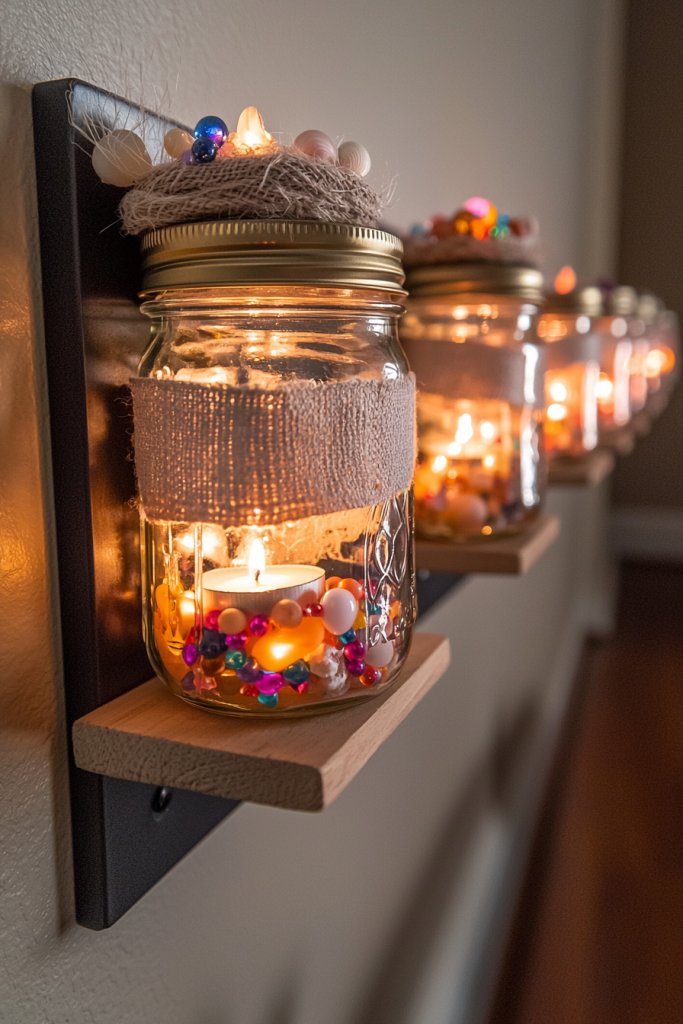
Mason jar wall sconces are a charming and practical way to add ambient lighting and decorative storage to a teenage girl’s room. These fixtures bring a rustic touch with their vintage glass jars and can be customized to suit any style—boho, farmhouse, or modern chic—adding warmth and character to the space.
Picture a wall with a row of three to five mason jars mounted on simple wooden or metal brackets. Inside each jar, you could place fairy lights or LED candles to create a soft, glowing ambiance. Alternatively, fill the jars with colorful beads, seashells, or dried flowers for a decorative touch. The top of each jar can be decorated with fabric or twine for added texture, and the brackets can be painted in coordinating colors such as matte black, white, or metallic gold to match the room’s palette.
To assemble, gather mason jars, brackets, and lighting options like battery-operated fairy lights or small candles. Secure the brackets onto the wall with appropriate anchors, then screw or clip the jars into place. For added style, you can paint or decorate the jars with washi tape or chalk paint. This project is beginner-friendly and offers a cozy, personalized glow that enhances the room’s aesthetic and functionality.
13. Repurposed Ladder as a Chic Clothing or Accessory Rack
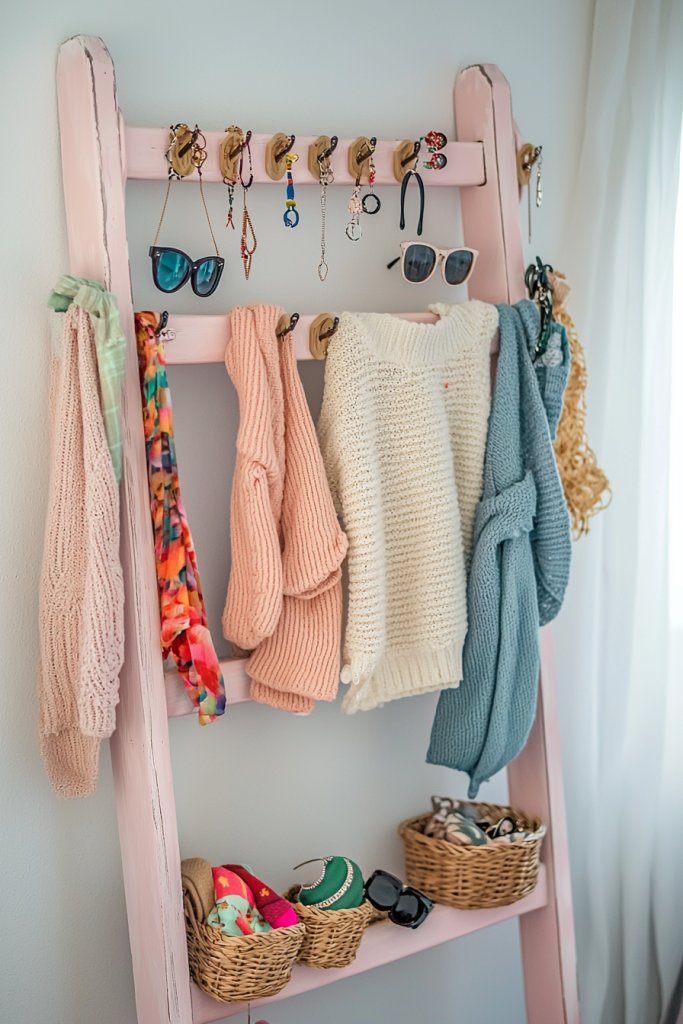
A repurposed wooden ladder is a versatile and stylish solution for organizing clothes, scarves, bags, or jewelry in a teen girl’s room. This DIY idea combines functionality with a trendy, rustic vibe, making it a focal point as well as an organizational tool.
Visualize a tall, vintage ladder leaning against a wall, with some steps or rungs decorated with hanging clothing, hanging baskets, or hooks. You could drape cozy sweaters, colorful scarves, or display jewelry on hangers or hooks attached to the rungs. For a more polished look, spray paint the ladder in a fun pastel or metallic shade to match your room’s color scheme. Adding small baskets or bins on the rungs can hold smaller accessories like hairbands or sunglasses.
To create this, find an old wooden ladder from a thrift store or repurpose one from around the house. Clean and sand it if needed, then paint or stain it for a fresh look. Attach hooks or clips to the rungs if necessary, and use it as a standing or leaning storage piece. This project is straightforward, cost-effective, and adds a charming, functional piece that keeps essentials within easy reach while adding visual interest.
14. DIY Painted Nightstand with Unique Patterns for a Style Statement
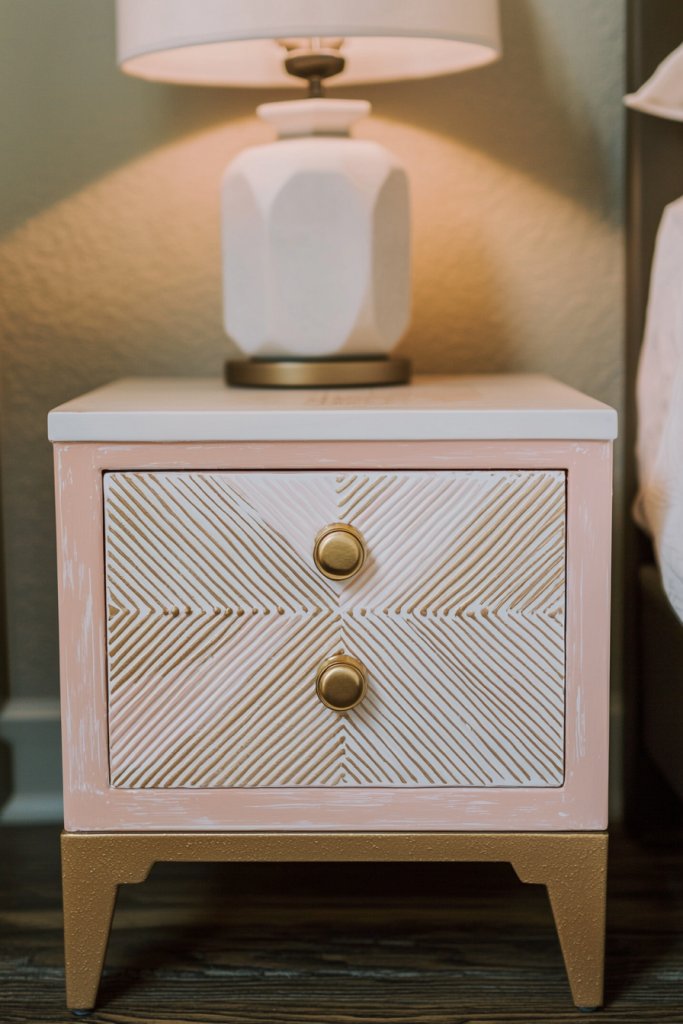
A DIY painted nightstand is an excellent way to introduce personality and a pop of color into a teen girl’s room while making a functional piece stand out. Creating a custom design with bold patterns or soft motifs allows for endless personalization options that match the room’s theme.
Imagine a simple wooden nightstand transformed with a fresh coat of paint in a soft blush, mint, or lavender. Add a geometric pattern, watercolor effect, or even hand-painted doodles using painter’s tape and acrylic or chalk paint. For example, a white base with gold or black geometric lines creates a modern, chic look, while a pastel gradient adds a dreamy, artsy vibe. The textured surface, combined with decorative knobs or handles, enhances the style and makes the piece a true focal point.
Start by choosing a nightstand with a solid surface—wood or MDF—then sand it lightly to prepare for painting. Use painter’s tape to section off areas for patterns, or freehand designs for a more artistic touch. Apply two coats of paint, allowing each to dry thoroughly, and finish with a clear sealant for durability. Swap out the knobs with cute, personalized handles from craft stores for a final custom touch. This project is beginner-friendly and results in a one-of-a-kind piece that elevates the entire room.
15. Tension Rod Closet Organizers for Efficient Space Use
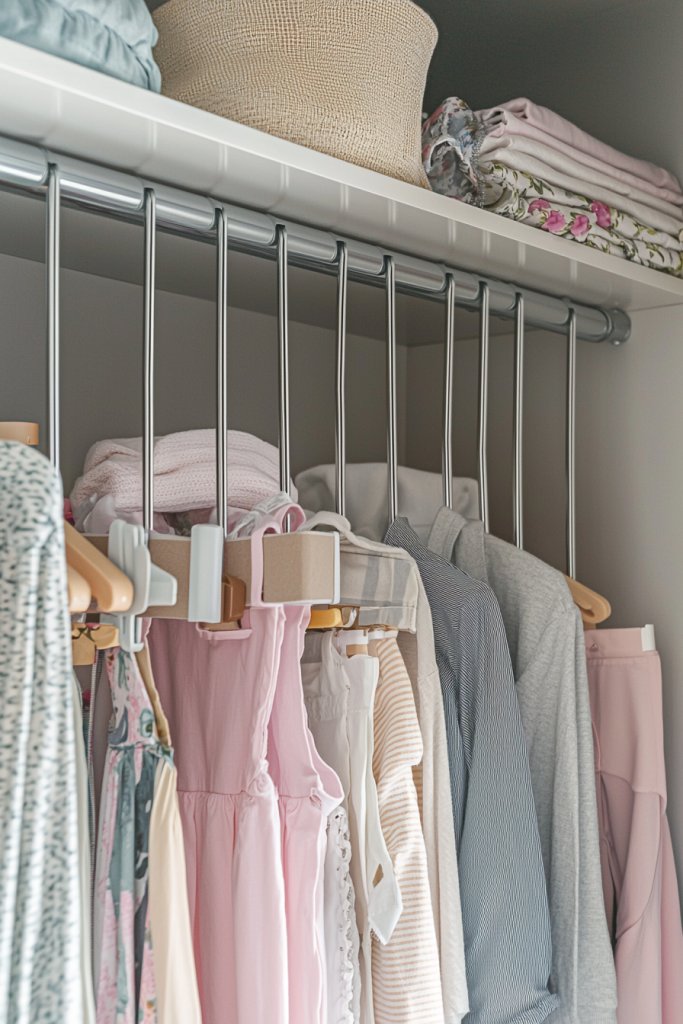
Tension rod closet organizers are an easy, affordable way to maximize storage and keep a teen girl’s closet neat and accessible. They’re perfect for creating additional hanging space or separating different categories of clothing, all without damaging walls or requiring permanent installation.
Visualize a closet with one or two tension rods installed horizontally across the space. These rods can hold hanging baskets, scarves, or even shoes in fabric pockets. For example, a tension rod near the closet door can hang accessories, while another across the width of the closet can support cascading hangers for shirts or skirts. The rods are adjustable, so you can customize the height and length to suit your needs. Pairing these with small bins or stackable storage can further optimize space and organization.
To set up, measure your closet dimensions, then extend the tension rods between opposite sides, ensuring they are tight and secure. Add fabric or mesh storage baskets that hang from the rods for small accessories or folded items. For a cohesive look, choose neutral or matching colors to blend seamlessly with your room’s decor. This solution is simple, inexpensive, and highly adaptable—making it perfect for busy teens who want a stylish, clutter-free space.
16. Personalized Canvas Art Using Paint or Fabric Prints
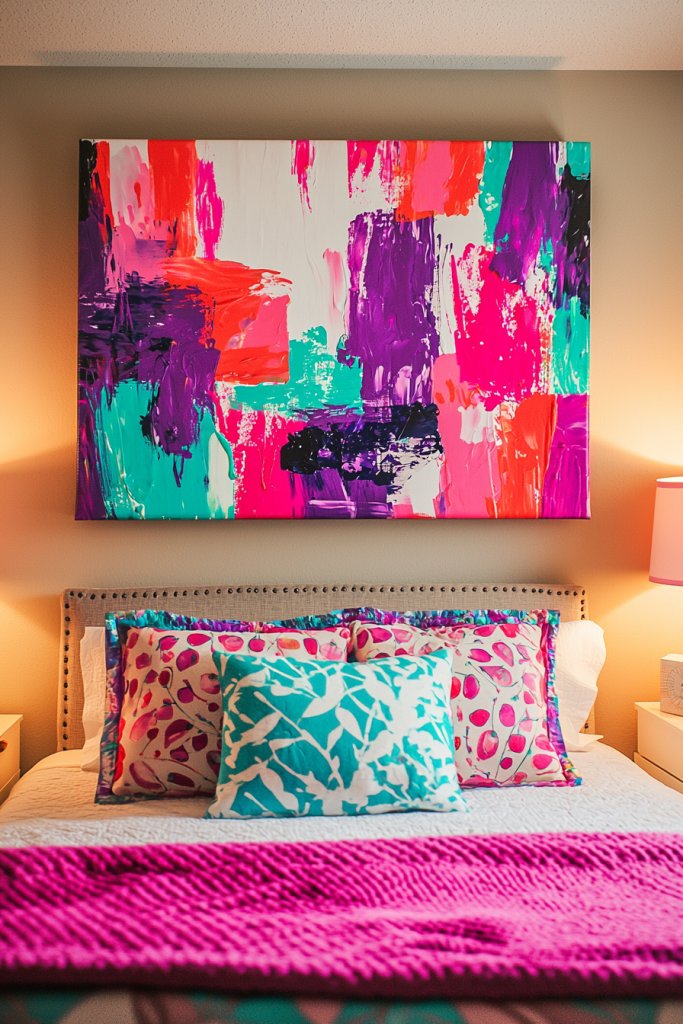
Creating personalized canvas art is a fantastic way for teen girls to showcase their unique style and add a vibrant focal point to their rooms. This project transforms a blank canvas into a meaningful piece that reflects their personality, favorite colors, or inspiring quotes, making their space truly one-of-a-kind. It’s a fun, creative outlet that also enhances the room’s aesthetic appeal.
Imagine a large, rectangular canvas hung above the bed or dresser, featuring bold, colorful strokes of acrylic paint or a collage of fabric prints arranged in an eye-catching pattern. The background might be a soft pastel hue, like blush pink or mint green, with textured paint layers adding depth and dimension. Overlaid are handwritten quotes in metallic ink or geometric shapes made from patterned fabric patches, creating a playful yet sophisticated look. The tactile textures of fabric and the glossy shine of fresh paint elevate the visual interest, making the artwork both a statement piece and a reflection of their personality.
Getting started is simple. First, choose a high-quality blank canvas—sizes can vary based on space and preference. Gather acrylic paints in favorite shades or a selection of colorful fabric scraps. If painting, sketch your design lightly with a pencil before filling it in with bold brushstrokes. For fabric prints, cut out shapes or patterns and glue them onto the canvas with fabric adhesive or mod podge, smoothing out any wrinkles. Finish with a protective spray or clear acrylic sealer, and hang it in a spot where it can inspire every day.
17. DIY Rope or Chain Curtain for Room Dividers or Window Accents
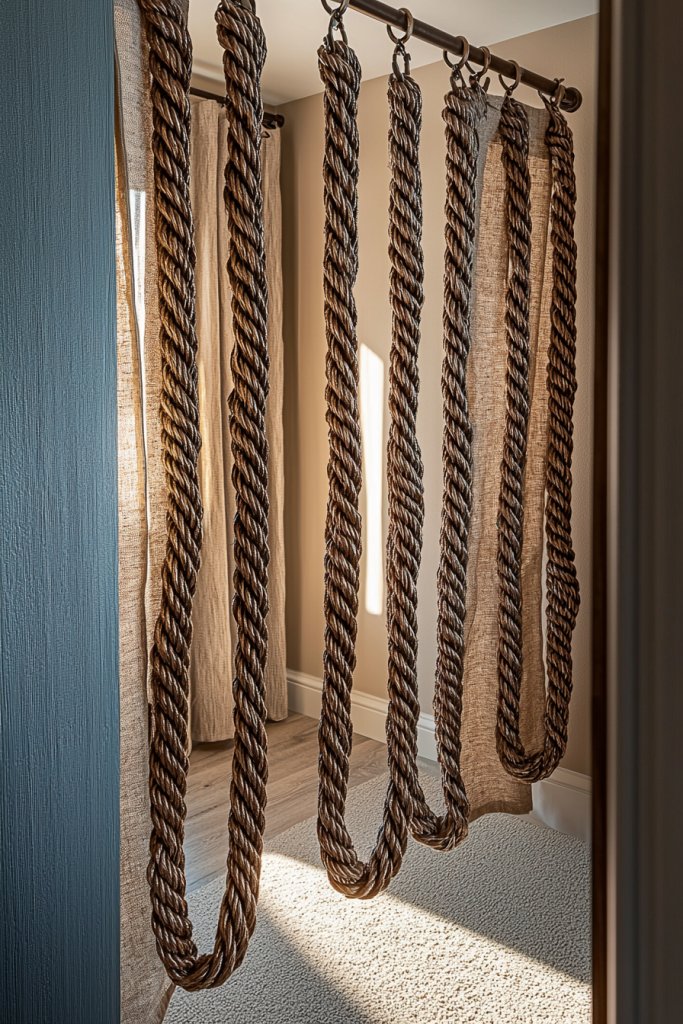
A DIY rope or chain curtain offers a chic, bohemian touch that can instantly transform a room, creating a semi-private space or adding visual interest around windows. This simple yet stylish decor element not only divides spaces but also introduces texture and movement, making any teen’s room feel more dynamic and personalized.
Picture a cascade of thick, intertwined ropes or metallic chains draping from ceiling to floor or framing a window. The ropes could be in neutral tones like beige or white for a soft, earthy feel, or in bold colors such as navy or coral to make a statement. The chains might feature a brushed brass or matte black finish, adding an industrial vibe. The curtain moves gently with air currents, casting delicate shadows and creating a calming, cozy ambiance. It’s a tactile, visual feature that complements various decor styles, from boho to modern minimalism.
To make one, start by gathering sturdy ropes or lengths of chain—about 4-6 feet long depending on your space. Use carabiners, hooks, or eye screws to attach the ends to the ceiling or a tension rod for easy installation. If using ropes, you can braid or knot sections for added texture. For chains, connect links to create a flowing curtain pattern. Optional: add decorative tassels or beads along the ropes for extra flair. Hang the curtain in a designated corner, room divider, or over a window to instantly elevate your teen’s room decor.
18. Decorated Cork Coasters as Functional Decor and Personal Touches

Decorated cork coasters are a clever way to combine practicality with personalized style, perfect for teens who love hosting friends or want to add a fun element to their room decor. They serve as protective surfaces for drinks while also acting as mini canvas for creative expression, making them both useful and decorative.
Visualize a set of plain cork coasters, each roughly four inches square, transformed into mini works of art. Using acrylic paints, permanent markers, or decorative washi tapes, teens can create designs that match their room’s color palette—think geometric patterns, floral motifs, or inspirational words. They might also glue on small charms, stickers, or even pressed flowers for a more textured look. Once decorated, seal the designs with a clear acrylic spray to ensure durability, and stack or display them on a decorative tray or shelf when not in use.
To craft your own, start with a set of plain cork coasters—available at craft stores or online. Select your favorite paints, markers, or tapes, and sketch or plan your designs first. Carefully decorate each coaster, allowing paint or ink to dry thoroughly. For added protection, spray a clear sealant over the finished designs. Use double-sided adhesive pads or small rubber feet on the bottom to prevent slipping. These personalized coasters are perfect for adding a splash of color and personality to any teen girl’s room or shared space.
19. Upcycled Suitcase Stacks for Stylish Storage and Vintage Vibe
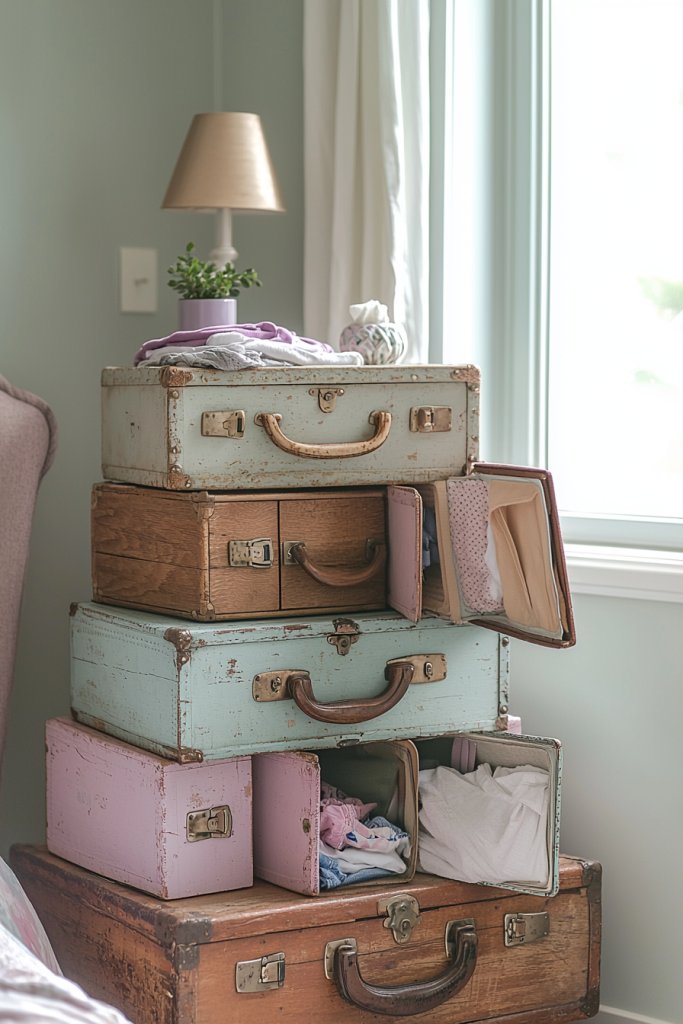
Stacked vintage suitcases are an eye-catching, functional decor solution that brings both nostalgia and style into a teen’s room. These upcycled pieces provide ample storage for clothes, books, or keepsakes while serving as a charming retro accent that complements various decor themes like boho, shabby chic, or industrial.
Picture a tower of suitcases in varying sizes, stacked securely on top of each other. The outer surfaces might be decorated with floral patterns, vintage travel stickers, or painted with soft pastel shades to match the room’s color scheme. The suitcases can be left with their original aged patina for a rustic look or painted in a cohesive color for a more modern aesthetic. They create a visual focal point, adding texture and a sense of adventure to the space, while also concealing clutter inside. Placed beside a bed or in a corner, they turn storage into a stylish feature.
To assemble your own, gather vintage suitcases—thrift stores, flea markets, or online marketplaces are great sources. Clean and lightly sand if desired, then paint or decorate the exterior with fabric, decals, or paint for a customized look. Secure the suitcases together with heavy-duty glue, brackets, or straps to ensure stability. Inside, add fabric lining or storage bins for organizing smaller items. Position the stack in a suitable corner or by the bed, and enjoy a unique, vintage-inspired storage solution that also makes your room look adorable and inviting.
20. DIY Hanging Mesh Baskets for Easy Access to Essentials
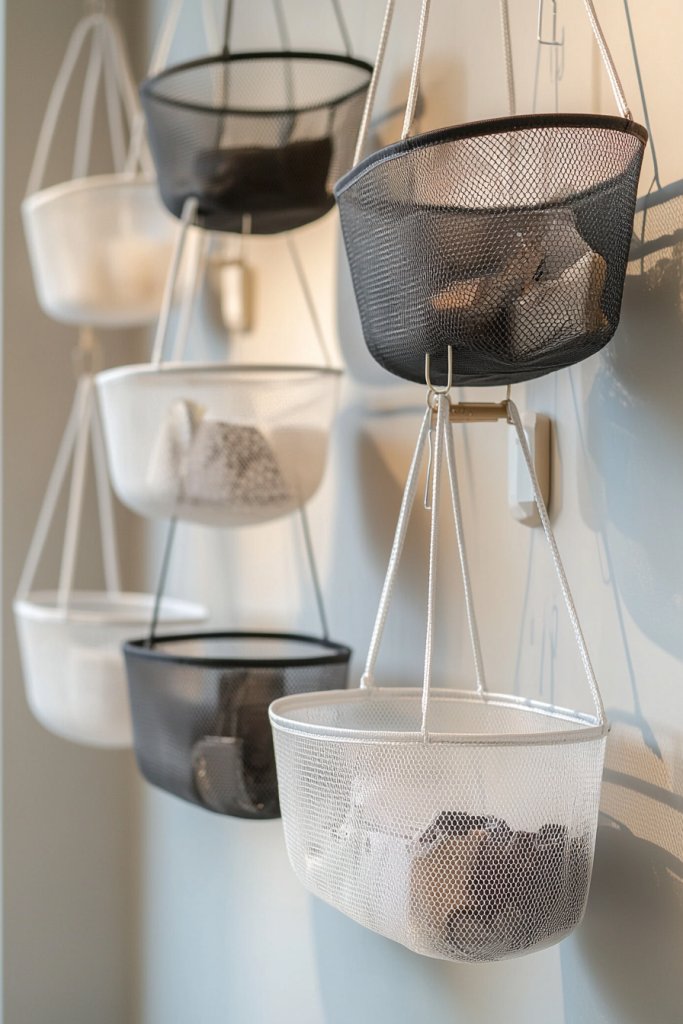
Hanging mesh baskets are a practical, stylish way to organize small accessories, cosmetics, or stationery while adding a modern touch to a teenage girl’s room. Their open design makes it easy to see and grab items quickly, helping keep the space tidy without sacrificing style.
Visualize a set of lightweight, breathable mesh baskets suspended from the ceiling or wall-mounted hooks. They might be in neutral tones like white or gray, or in bright colors such as pink or teal for a pop of fun. Each basket can hold jewelry, hair accessories, or art supplies, creating a clutter-free zone that’s visually appealing. The soft, flexible material gives a contemporary vibe, while their hanging nature adds vertical interest to the room’s decor, making them perfect for small spaces or to create a playful storage corner.
To make these baskets, start with mesh storage containers or repurpose old mesh laundry bags. Attach strong hooks, S-hooks, or command strips to the ceiling or wall for hanging. Loop the hooks through the mesh openings, ensuring they are secure enough to hold the weight of the contents. For added stability, you can sew or glue the edges of the mesh to reinforce the structure. Hang the baskets at various heights for visual interest, and fill them with your favorite small items. These DIY mesh baskets are an easy, budget-friendly way to keep essentials within reach and add a modern decorative element to your teen’s room.
21. Customizable Photo Clip String for Displaying Memories and Inspiration
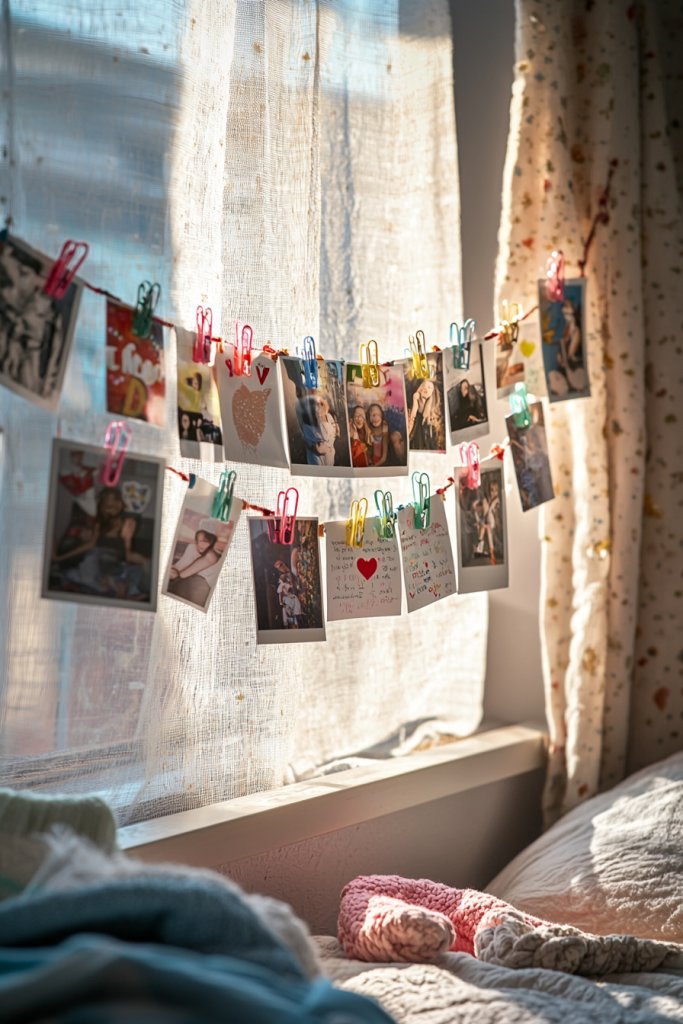
Looking for an easy way to showcase your favorite memories and daily inspiration? A personalized photo clip string adds a fun, dynamic touch to any teen girl’s room, making it feel cozy and uniquely hers. It’s a simple project that transforms space into a visual storybook filled with smiles and dreams.
Picture a delicate line of twine or thin wire stretched across a wall, secured with colorful clothespins or mini clips. Bright, cheerful photos—think casual snapshots, motivational quotes, or small artwork—are clipped along the string, creating a lively, ever-evolving gallery. You might add fairy lights intertwined with the string for a warm glow, or hang small decorative elements like paper flowers or charms for extra personality. The overall effect is playful yet meaningful, bringing a lively, personalized vibe to her space.
To create this, start by choosing a length of twine, thin wire, or colorful cord. Secure each end with command hooks or nails, making sure it’s taut. Gather your favorite photos, printed on regular or glossy paper, and attach them with mini clothespins, decorative clips, or even washi tape for a more eclectic look. For added flair, string battery-operated fairy lights along the line, and arrange your photos in a way that’s visually balanced. This project is beginner-friendly, inexpensive, and endlessly customizable to match her style.
22. DIY Washed Denim Pouch Organizer for Small Accessories
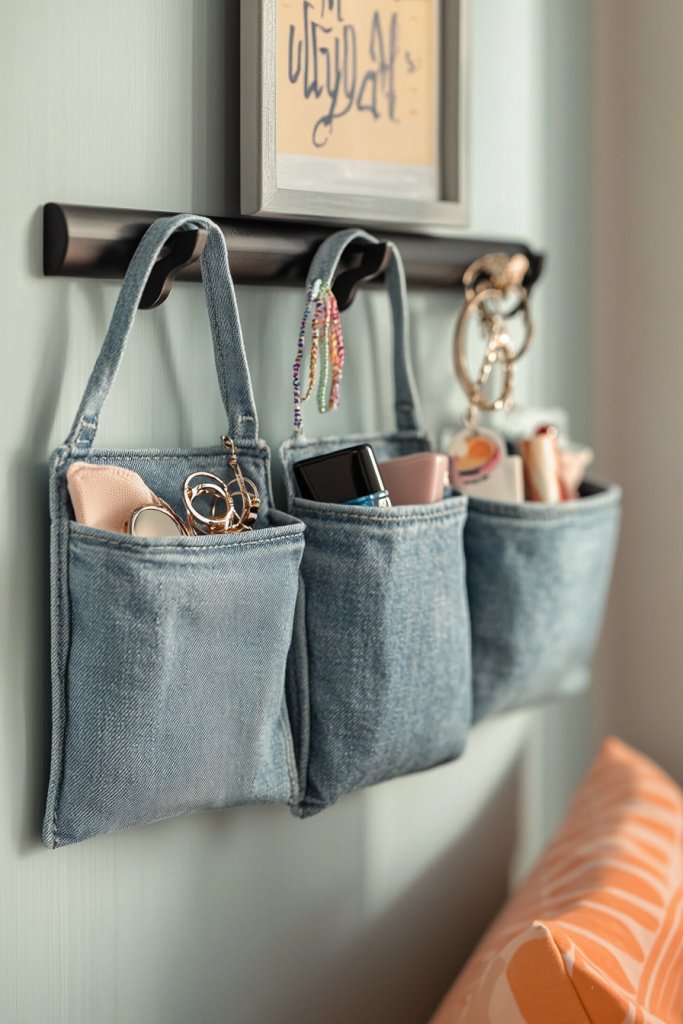
Struggling to keep tiny accessories like jewelry, hairbands, or lip balms organized? A DIY washed denim pouch offers a stylish, durable solution that adds a casual, trendy vibe to her room. Plus, it’s a fun craft that puts a personal spin on storage!
Imagine a soft, faded denim pouch with a relaxed, vintage look—think frayed edges, subtle creases, and a hint of distressed charm. The pouch is spacious enough to hold small essentials, with a simple fold-over flap or drawstring closure, accented with decorative stitching or a cute patch. Its neutral denim hue pairs effortlessly with pastel, blush, or bold color schemes, adding texture and a laid-back aesthetic to her space.
To make one, gather an old pair of denim jeans or a scrap of denim fabric. Cut a rectangular piece about 12×8 inches, then fold it in half. Sew or glue the sides, leaving the top open, and add a drawstring or button closure for security. For extra detail, sew on patches, embroidery, or fabric embellishments. This project is beginner-friendly, requires only basic sewing or gluing skills, and uses repurposed materials, making it budget-friendly and eco-conscious.
23. Creative Use of Removable Wallpaper for Accent Walls and Style Updates
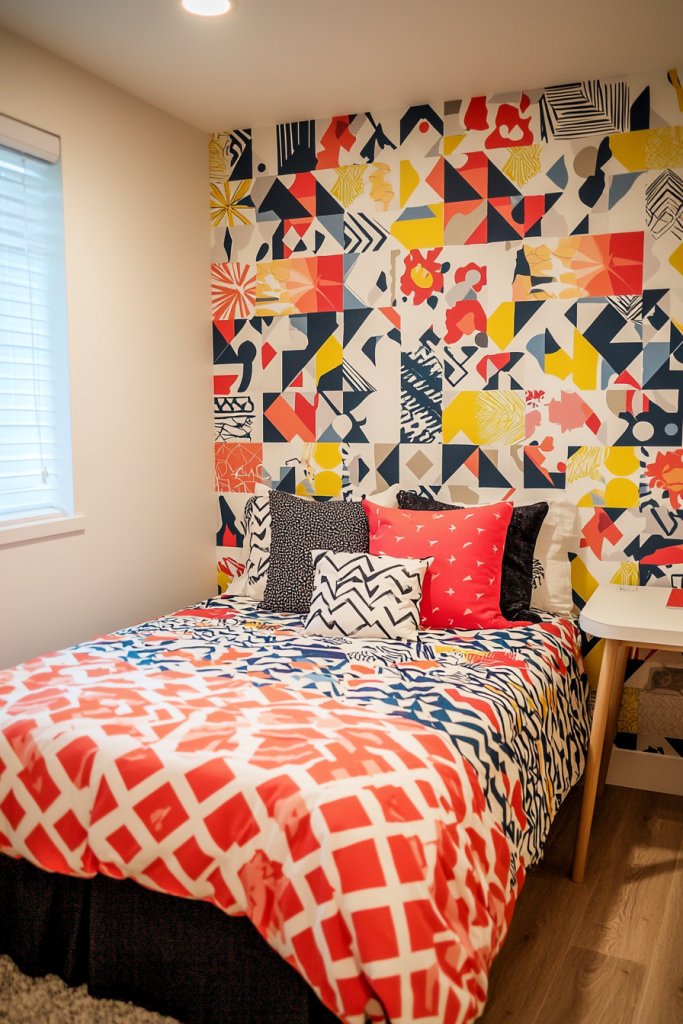
Feeling ready for a room refresh? Removable wallpaper is a game-changer, allowing teens to instantly add personality and style to their space without permanent changes. It’s perfect for experimenting with bold patterns or trendy textures, transforming a plain wall into a statement feature.
Visualize a feature wall covered in vibrant geometric patterns, soft florals, or playful polka dots—everything from matte finishes to metallic accents. The wallpaper can be applied seamlessly over existing paint, creating a striking backdrop for bedding, shelves, or decor pieces. Its versatility means the design can be swapped out easily, making it ideal for teens who love to change their room’s look according to seasons or trends. The overall aesthetic is fun, modern, and highly customizable, with a variety of prints and colors to suit any personality.
To install, measure the wall and cut the removable wallpaper to size, leaving a slight margin. Peel off the backing in sections and carefully smooth the wallpaper onto the wall, using a squeegee or credit card to eliminate air bubbles. For corners and edges, trim with a craft knife. It’s a straightforward DIY project that requires no special tools—just patience and a clean, dry surface. This approach offers a quick, damage-free way to update her room’s style, making it a perfect weekend project.
Conclusion
With so many creative DIY ideas—from stylish wall shelves and personalized decor to clever storage solutions—teen girls can transform their rooms into both functional and expressive spaces. These projects offer a perfect mix of practicality and style, empowering teens to customize their environment and showcase their personalities. Don’t hesitate to try these inspiring ideas and make your space uniquely yours—your dream room is just a DIY project away! Start creating today and watch your room come to life with your personal touch.
Leave a Reply