Ever dreamed of transforming a tiny kitchen into a functional and stylish space? Small kitchen layouts are more popular than ever, and it’s easy to see why—they challenge you to get creative with storage, design, and efficiency. With limited square footage, clever layouts and smart solutions can make your kitchen feel more spacious, organized, and welcoming, proving that big things really can come in small packages.
In this article, you’ll discover a wealth of practical ideas and inspiring concepts to maximize every inch of your small kitchen. From vertical storage hacks and sleek cabinetry to space-saving appliances and multi-purpose furniture, these tips will help you craft a layout that’s both beautiful and highly functional. Whether you’re remodeling or simply looking for fresh ideas, get ready to unlock the full potential of your compact kitchen!
1. Optimize Vertical Storage with Tall Cabinets
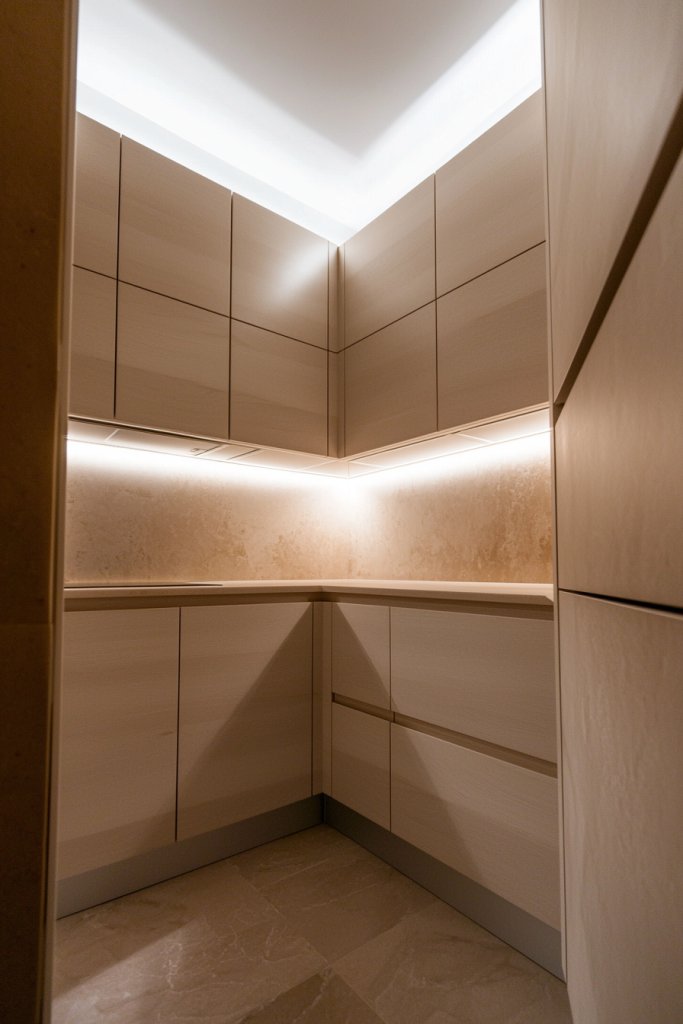
Maximizing storage in a small kitchen is all about using every inch wisely, and tall cabinets are a game-changer. They reach up to the ceiling, transforming unused vertical space into abundant storage, making your kitchen feel more organized and spacious. This approach not only keeps countertops clear but also creates a sleek, streamlined look that elevates the overall design.
Imagine a set of floor-to-ceiling cabinets in a soft matte white finish, with subtle handleless fronts for a minimalist vibe. Inside, adjustable shelves hold everything from stacked plates to pantry items, while the upper compartments store less frequently used essentials. The smooth, uninterrupted lines of these cabinets reflect light and add a sense of height, making the room appear larger. The subtle hum of the soft-close doors adds a touch of luxury, and the uniform look encourages a clutter-free environment.
To implement this, start by measuring your available wall space and choosing tall cabinets that fit snugly without crowding the room. Opt for pre-made units or custom cabinetry for a seamless appearance. Install them securely to the ceiling, and consider adding crown molding for a polished finish. Use organizers like pull-out trays, spice racks, or clear bins inside for easy access. If budget is a concern, mixing open shelving with tall cabinets can also help maximize vertical storage without overwhelming your budget.
2. Incorporate Open Shelving for Easy Access

Open shelving is a stylish, functional way to add storage in a small kitchen while maintaining an open, airy feel. It allows you to display your favorite dishes, glassware, or decorative ceramics, giving your space personality and warmth. Plus, it keeps everyday items within arm’s reach, speeding up meal prep and cleanup.
Picture a set of rustic wooden shelves mounted on a crisp white wall, with a few colorful plates, neatly stacked bowls, and a row of sleek glass jars filled with pasta and spices. The textures of the wood contrast beautifully with shiny metal or matte ceramics, creating visual interest. When you run your hand along the shelves, you can feel the natural grain of the wood, while the scent of fresh herbs or spices from the jars adds a sensory layer. The open design makes the kitchen feel larger and more inviting, perfect for a cozy yet functional space.
To add open shelving, choose sturdy, wall-mounted brackets and select wooden planks or metal shelves based on your style and budget. Install at eye level for easy access, making sure to secure them into wall studs for stability. Use attractive storage containers like colorful bowls or glass jars to keep things tidy and visually appealing. Decorate with a few curated items—such as a vintage teapot or a small sculpture—to avoid clutter and keep the look intentional. This simple upgrade can instantly brighten your kitchen and add character.
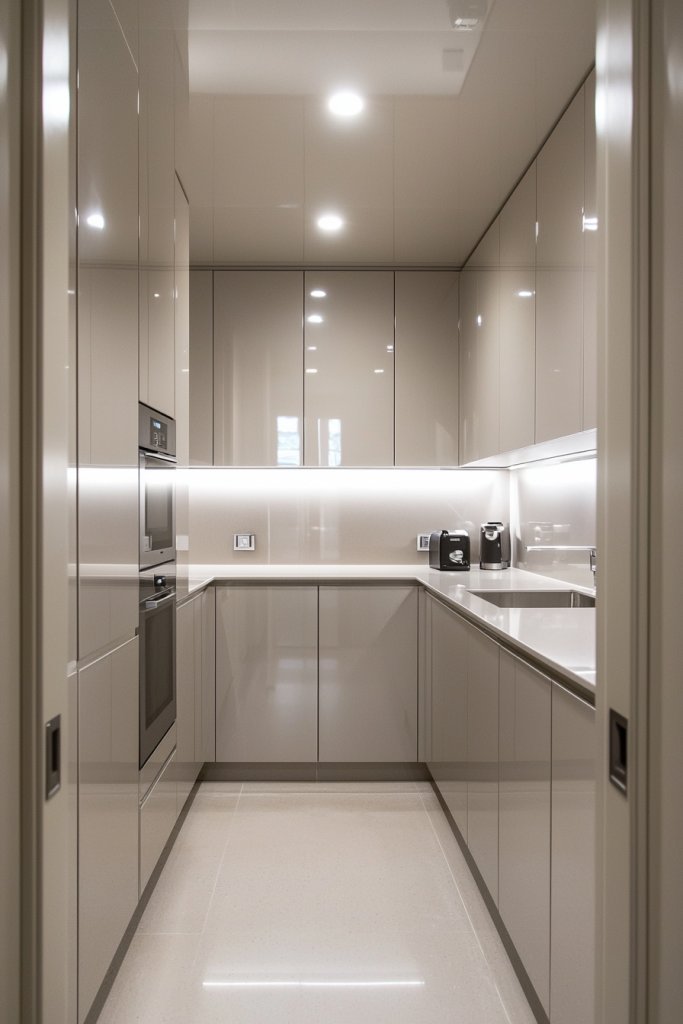
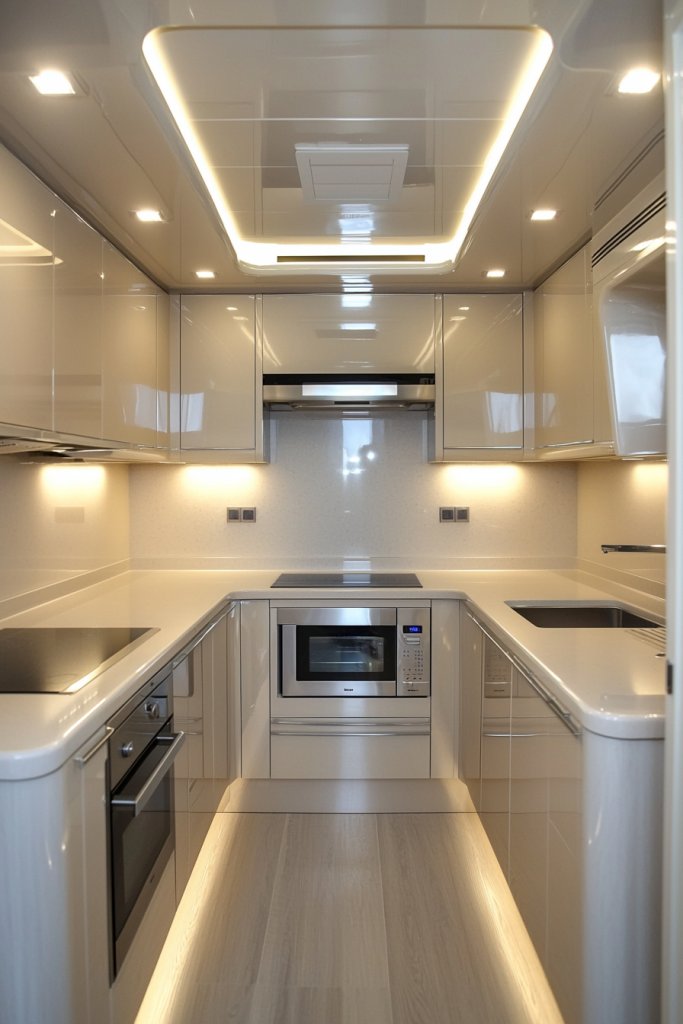
3. Implement a Galley Layout for Efficient Workflow
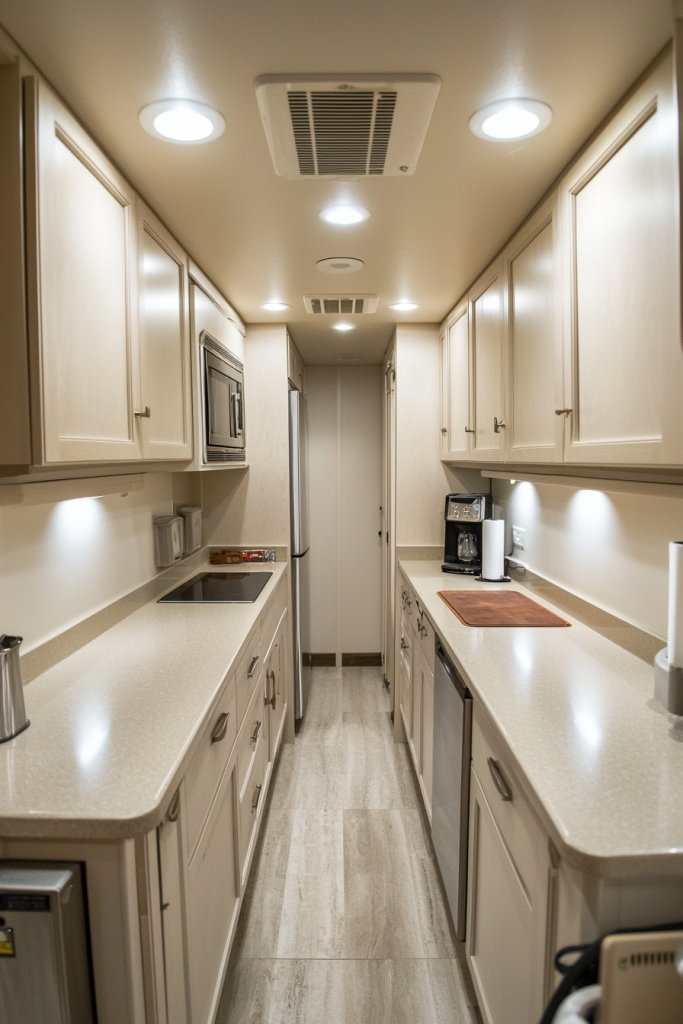
A galley kitchen layout is perfect for small spaces, creating a highly efficient workflow by arranging appliances and work zones in two parallel lines. This design minimizes wasted movement, making cooking and cleaning seamless, and fits neatly into narrow or rectangular rooms.
Visualize two parallel countertops, one housing your sink and dishwasher, and the other with your stove and prep area. Between them, a narrow walkway allows you to move effortlessly from one zone to another. The cabinetry is sleek and uniform, often in light shades to reflect natural light and open up the space. Bright under-cabinet lighting illuminates the countertops, highlighting the smooth surface of quartz or laminate, while the stainless steel appliances add a modern touch. The overall effect is a compact, highly functional corridor that maximizes every inch of your small kitchen.
To create this layout, measure your space carefully and plan for a corridor width of at least 42 inches for comfortable movement. Use standard-sized appliances to fit within the dimensions, and keep the work zones close but separated logically—storage near prep areas, and cleaning near the sink. Install matching cabinetry and consider open shelving or glass-front doors to keep the look light. Keep clutter to a minimum by utilizing drawer organizers and pull-out pantry units, ensuring everything is within easy reach for everyday use.
4. Use Multi-Functional Furniture Pieces
In a small kitchen, furniture that serves more than one purpose is essential for maximizing space. Think of a kitchen island with built-in storage or a fold-away table that can double as a prep surface and dining spot. These versatile pieces help keep your kitchen open and adaptable to different needs.
Imagine a sleek, compact kitchen island with drawers and cabinets underneath, topped with a durable butcher block surface. When not in use for food prep, it can serve as a casual dining area with a couple of stools tucked underneath. Alternatively, picture a wall-mounted fold-down table that swings down when needed—perfect for breakfast or quick meals—and folds back up to free space when not in use. These pieces are typically made of lightweight but sturdy materials like wood or metal, and can be painted in neutral shades or bold colors to match your decor.
To incorporate multi-functional furniture, start with a small, mobile kitchen cart with wheels for flexibility. Look for models with built-in storage or extendable surfaces, and place them where they can be easily moved or tucked away. For fold-away options, install a sturdy wall bracket that supports a drop-leaf or fold-down table, secured with a latch or lock when in use. Combine these with compact stools or foldable chairs for a flexible, clutter-free environment that adapts to your daily routines and occasional gatherings.
5. Install Corner Cabinets with Lazy Susans
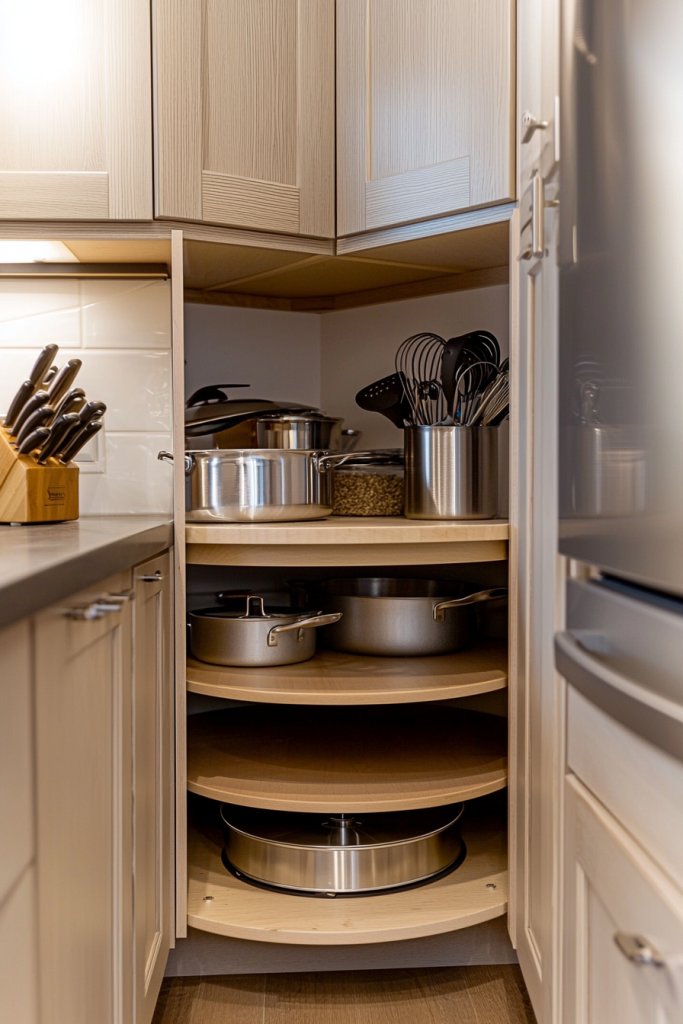
Corner cabinets are often underutilized, but with a Lazy Susan turntable inside, they become some of the most practical storage solutions. They make it easy to access pots, pans, or small appliances kept in the deep corners of your kitchen without crawling inside or knocking over other items.
Picture a corner cabinet with a smooth-turning Lazy Susan, featuring multiple tiers of sturdy, rotating shelves. The shelves are lined with non-slip mats, holding everything from baking sheets to spice jars. The glossy, painted interior contrasts with the matte exterior of your cabinets, while a soft LED light inside illuminates stored items when you open the door. This setup keeps your corner space tidy and accessible, preventing wasted space and making your small kitchen feel more organized.
To install this, measure your corner cabinet dimensions and purchase a Lazy Susan compatible with your cabinet size. Remove any existing shelving and replace it with the turntable system, ensuring it spins smoothly and is securely fastened. Use clear containers or labeled jars to maximize visibility, and organize items by frequency of use. For added convenience, consider installing pull-out baskets or additional racks within the corner to further optimize storage. This simple upgrade can transform a tricky corner into a highly functional, clutter-free zone.
6. Embrace Minimalist Design with Sleek Cabinetry
Adopting a minimalist design with sleek cabinetry is a game-changer for small kitchens, transforming cluttered spaces into serene, functional areas. This approach not only maximizes visual space but also creates a calm, modern ambiance that makes even tiny kitchens feel more open and inviting.
Picture flat-panel cabinets in soft, neutral shades like matte white, light gray, or muted taupe, with handle-less fronts that blend seamlessly into the walls. The smooth surfaces reflect light and reduce visual noise, while concealed hardware maintains a sleek, uninterrupted look. The overall aesthetic is clean and uncluttered, with just a few carefully chosen decorative accents—like a minimalist ceramic bowl or a subtle metallic faucet—adding personality without overwhelming the space. The interplay of matte finishes and reflective surfaces creates a harmonious balance that feels both fresh and calming, allowing the kitchen’s true functionality to shine through.
To recreate this aesthetic, start by choosing flat-panel cabinets in light, neutral tones. Opt for handle-less designs or integrated push-to-open mechanisms for a seamless look. Keep counters free of clutter, using concealed storage solutions for small items. For a truly streamlined appearance, select appliances with flush fronts or hide them behind cabinetry panels. Finish with simple hardware options like discreet finger pulls or no hardware at all. This design is perfect for beginners and offers a timeless, sophisticated look that makes your small kitchen feel larger and more organized.
7. Add a Slimline Dishwasher or Appliances
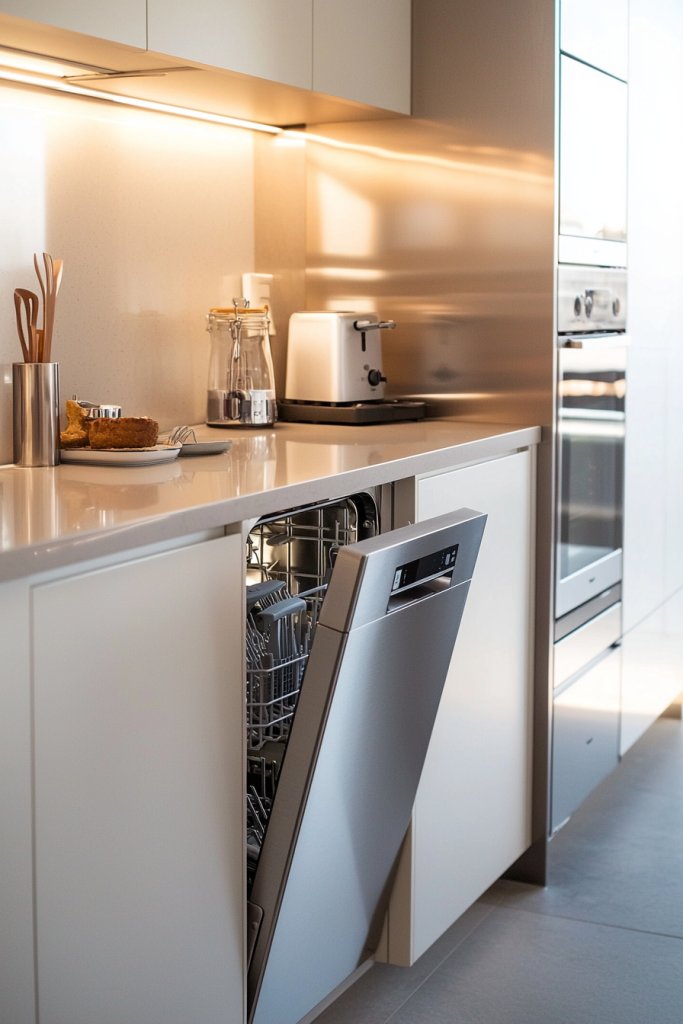
In small kitchens, every inch counts, so integrating slimline appliances is an essential trick for maximizing space without sacrificing functionality. A narrow dishwasher or compact appliances help you keep countertops clear and free up valuable floor space, making your kitchen feel more open and efficient.
Visualize a sleek, narrow dishwasher—about 18 inches wide—hidden behind matching cabinet panels that blend seamlessly with the rest of your cabinetry. Nearby, a compact microwave or a slim refrigerator in a clean, modern design can tuck away essential appliances without crowding the room. The finishes might include stainless steel, matte black, or clean white to complement minimalist or contemporary styles. These appliances often feature quiet operation and energy-efficient technology, enhancing both convenience and sustainability. When integrated thoughtfully, they contribute to a clutter-free environment where every appliance has a purpose and fits neatly into your design.
To implement, measure your existing spaces to select the right-sized appliances—many brands offer 18-inch or even 24-inch options designed specifically for small kitchens. Choose appliances with sleek, simple controls and finishes that match your cabinetry for a cohesive look. Consider installing a built-in microwave above the countertop or within cabinetry for extra space savings. Look for multi-function appliances, such as a combo washer-dryer or a refrigerator with a freezer drawer, to further optimize your layout. With a bit of planning, these space-saving appliances make your small kitchen as functional as a larger one, without sacrificing style.
8. Create a Double Duty Breakfast Bar
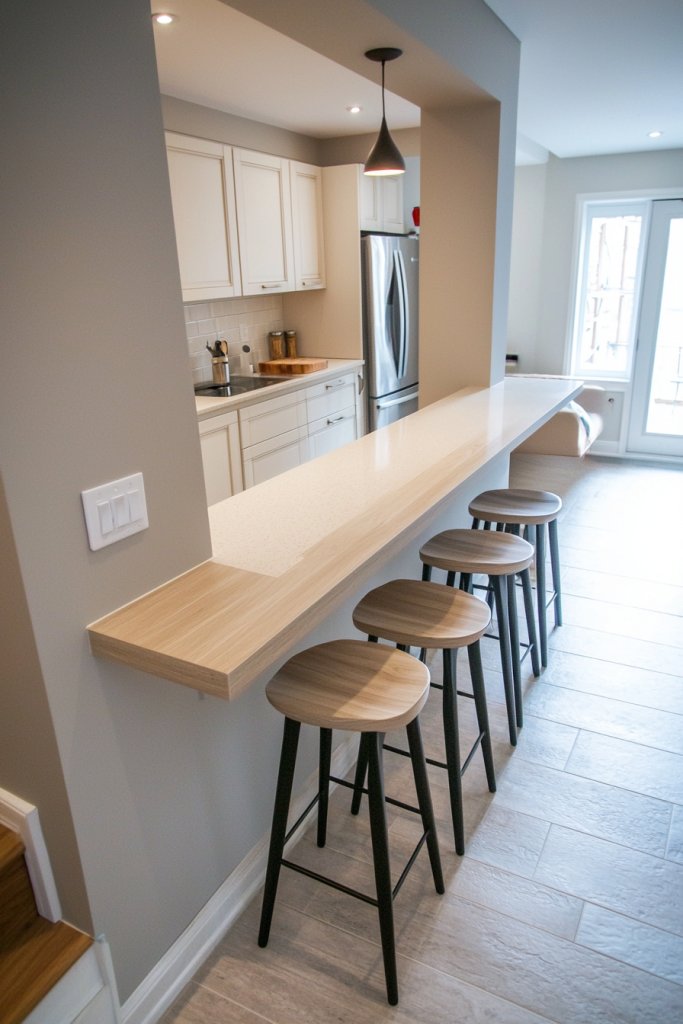
A double-duty breakfast bar is a clever way to combine dining, prepping, and extra storage in a compact space, making your small kitchen more versatile and social. This multifunctional feature acts as a hub for meal preparation and casual dining, perfect for maximizing every square inch.
Imagine a streamlined countertop extending from a wall or island, topped with a durable surface like quartz or butcher block, in a warm wood tone or sleek white. The overhang provides enough legroom for stools, turning the space into a cozy spot for breakfast or quick meals. Beneath the surface, incorporate built-in storage such as drawers or open shelves for utensils, cookbooks, or small appliances, maintaining a clutter-free surface. Add decorative elements like a soft, textured throw blanket or a colorful ceramic vase to inject personality. The result is a functional, inviting space that doubles as a gathering spot and workspace, creating a sense of openness and efficiency.
To build your own, start with a sturdy, easy-to-clean countertop material that complements your existing cabinetry. Ensure the overhang allows comfortable seating and place a couple of stylish bar stools underneath. Maximize storage by adding pull-out drawers or floating shelves beneath the counter. If space is limited, consider a fold-down or drop-leaf extension that can be tucked away when not needed. With thoughtful design, this double-duty breakfast bar will become the heart of your small kitchen, blending practicality with style seamlessly.
9. Incorporate Under-Cabinet Lighting for Brightness
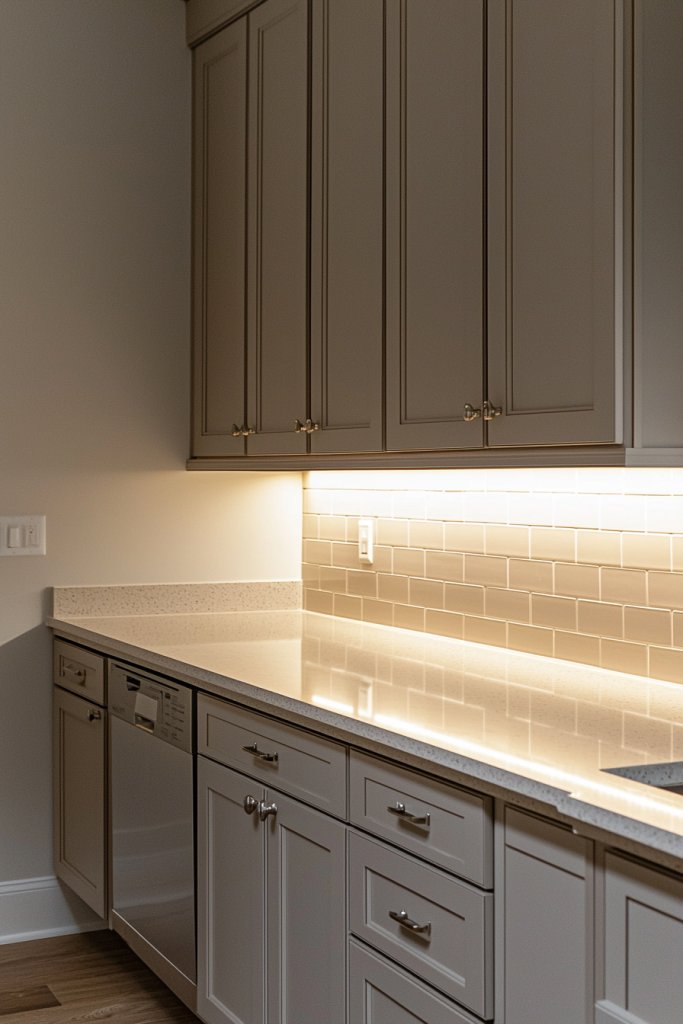
Under-cabinet lighting is a simple yet powerful upgrade that transforms a small kitchen from cramped to luminous, enhancing both functionality and ambiance. Proper lighting under cabinets illuminates work surfaces, reduces shadows, and adds a welcoming glow that makes the space feel larger and more open.
Visualize soft LED strip lights or puck lights mounted discreetly beneath your upper cabinets, casting a warm, even glow across countertops. The light’s color temperature can range from cool white to warm yellow, depending on your style preference, but warm tones tend to create a cozy, inviting atmosphere. The reflective surfaces of your countertops and backsplash bounce the light around, amplifying the sense of space and brightness. This layered lighting approach not only improves visibility for cooking and cleaning but also adds a subtle, modern glow that elevates your kitchen’s aesthetic. The combination of task and accent lighting creates a balanced, functional space that feels larger and more inviting.
To install, measure the length of your upper cabinets and choose LED strip lights or puck lights that fit your space. Many options are plug-in or hardwired, with easy-to-follow installation kits suitable for beginners. Secure the lights beneath the cabinets with the provided adhesive or mounting hardware, and connect to a power source. Adjust the brightness and color temperature to suit your mood, and enjoy an instantly brighter, more attractive kitchen. This simple upgrade requires minimal tools and effort but delivers a significant visual and practical payoff.
10. Use Mirror Backsplashes to Expand Visual Space
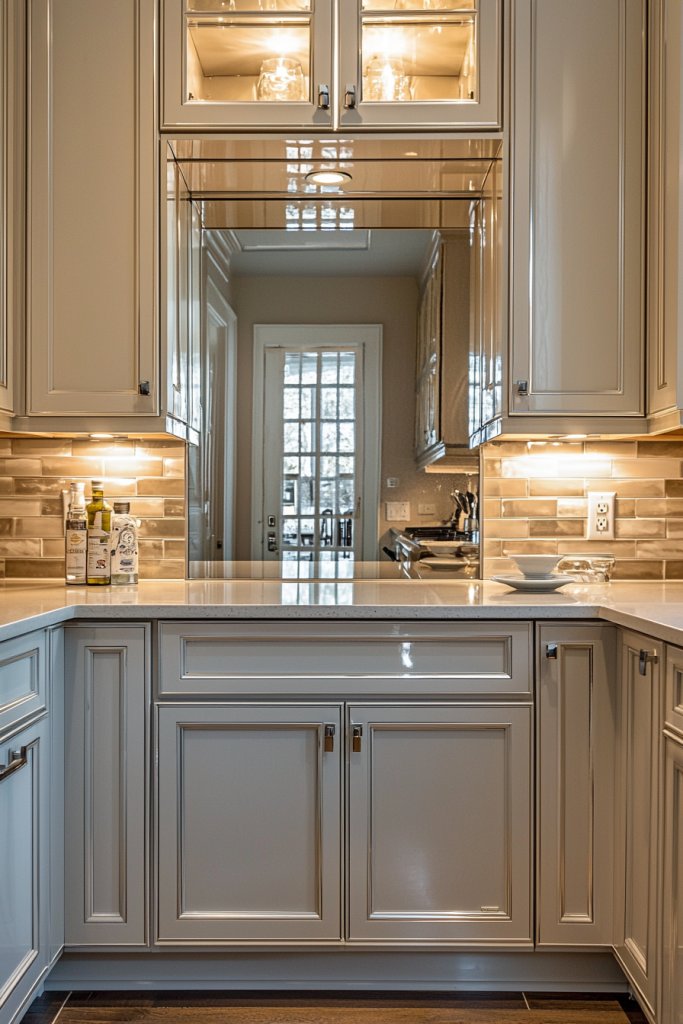
A mirror backsplash is a clever trick that instantly transforms a small kitchen, making it appear more spacious and open. By reflecting light and surrounding elements, it creates an illusion of depth, turning a cramped area into a bright, airy space that invites you to linger.
Imagine a sleek, glossy mirror panel installed behind your stove and countertop, seamlessly blending with your existing cabinetry. The reflective surface catches and amplifies the ambient light, bouncing it across the room. The mirrored backsplash pairs beautifully with soft, neutral tones like pale gray or creamy white, adding a modern touch. Its smooth, glassy texture feels cool to the touch, while the reflective quality sparks a sense of freshness and cleanliness. Small details like a subtle beveled edge or a frameless design can enhance the sophisticated look, making the space feel both elegant and functional.
Getting started is simple: you’ll need a high-quality mirror cut to fit your wall, along with appropriate mounting hardware and sealant to keep everything secure and moisture-resistant. For a budget-friendly option, peel-and-stick mirror tiles can be an easy alternative that still delivers a stunning effect. Clean the wall thoroughly before installation, then carefully affix the mirror panels, ensuring no air bubbles or gaps. To keep the reflective surface looking pristine, wipe it regularly with a glass cleaner, and enjoy your expanded, luminous kitchen space.
11. Opt for a Pocket or Sliding Door Entrance
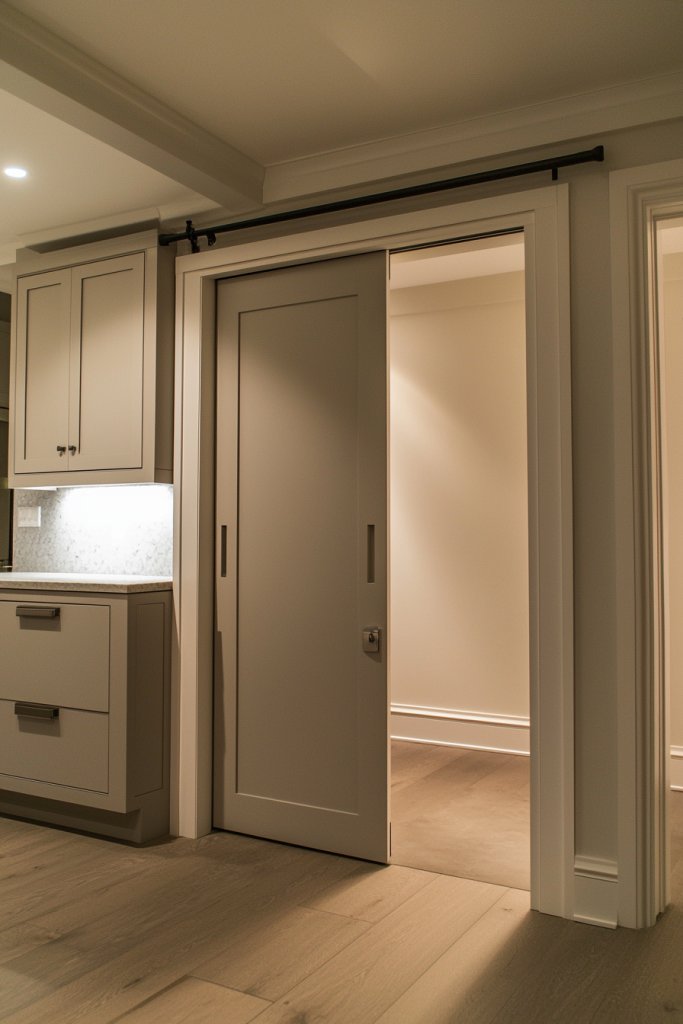
Maximizing space in a small kitchen often means rethinking traditional entryways, and pocket or sliding doors are a clever solution that saves valuable square footage. These doors slide seamlessly into the wall or into a pocket, eliminating the swing space required by standard doors and creating a sleek, streamlined look. They are especially useful in tight corners or narrow doorways, allowing for easier movement and better flow between rooms.
Imagine a smooth, matte black sliding door that glides effortlessly along a minimalist track, revealing a bright, open kitchen behind it. The door might be made of frosted glass or a simple wood veneer, adding a modern touch while maintaining privacy. When open, the space feels larger and more connected, with the door disappearing into the wall or pocket. The overall aesthetic is clean and uncluttered, with the door seamlessly blending into the wall for a cohesive look.
To implement this, start by measuring your doorway to determine the size of the sliding or pocket door needed. You can find pre-made sliding door kits at hardware stores or opt for a custom build if your space requires a specific style or material. Install a sturdy track system according to the manufacturer’s instructions, ensuring smooth operation. For a budget-friendly update, consider a lightweight MDF or plywood door painted in a neutral tone, or choose a high-quality veneer or glass panel for a more polished appearance. With simple tools and a little patience, you can transform your small kitchen’s entry into a space-saving feature that enhances both function and style.
12. Maximize Under-Sink and Wall Space with Hooks and Racks
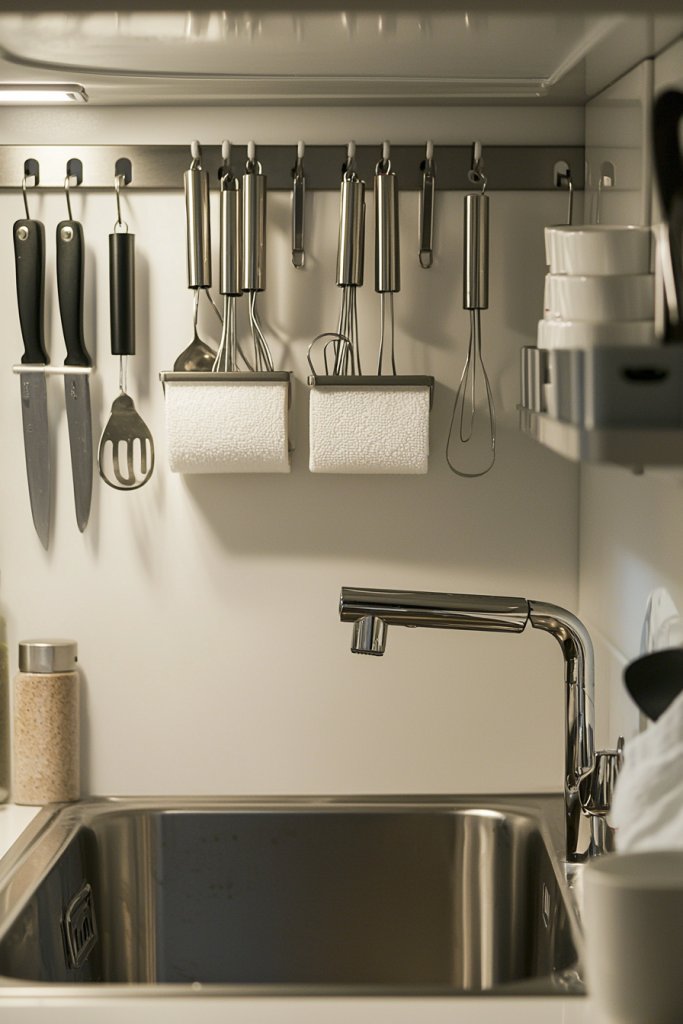
In small kitchens, every inch counts, and utilizing vertical and under-sink spaces can dramatically boost organization and accessibility. Installing hooks, racks, and magnetic strips allows you to keep utensils, pots, pans, and cleaning supplies within arm’s reach, reducing clutter on countertops and making your workspace more efficient. These solutions turn often-neglected areas into functional storage zones that keep essentials tidy and easy to find.
Picture a sleek magnetic strip mounted on the wall above the countertop, holding knives and metal tools securely in place. Beneath the sink, a compact wire rack is attached to the cabinet door, holding brushes and sponges, while hooks hang from the inside of the cabinet for hanging dish towels or cleaning sprays. On the back of a door, a small rack holds cutting boards or baking sheets. The materials are usually stainless steel, plastic, or coated wire, which are durable and easy to clean, adding a modern touch to the overall aesthetic.
Getting started is simple: gather stainless steel hooks, magnetic strips, and wire racks from your local hardware store. Measure the space available and choose options that fit comfortably without overcrowding. Install the hooks and racks using appropriate screws or adhesive strips, depending on the weight and surface. For a DIY-friendly approach, opt for adhesive-backed hooks or tension-mounted racks that require no drilling. With a little effort, you’ll create a smarter, more organized kitchen that feels larger and more functional every day.
13. Integrate Compact Appliances into Custom Cabinets
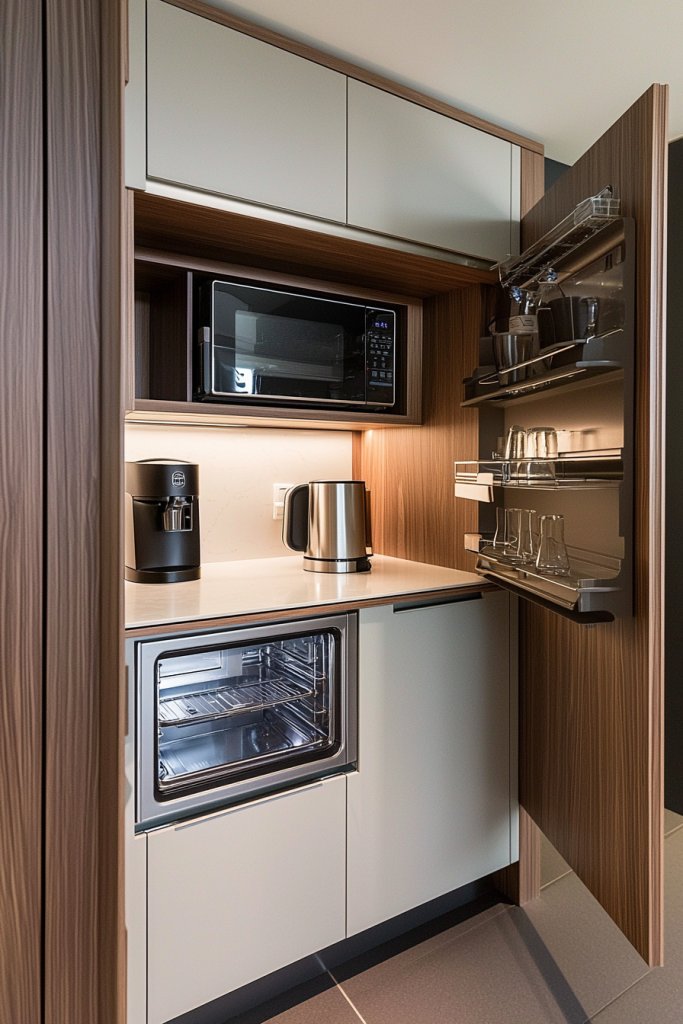
In small kitchens, built-in and integrated appliances are essential for maintaining a sleek, clutter-free environment. Hiding appliances like microwaves, coffee makers, and even mini-fridges within custom cabinetry creates a seamless look while saving countertop space. This approach not only maximizes usable surface area but also contributes to a tidy, modern aesthetic that feels open and inviting.
Visualize a custom cabinet with a flush, push-to-open door that conceals a compact microwave, with a matching panel that blends perfectly with the surrounding cabinetry. Nearby, a custom drawer houses a mini-fridge, discreetly tucked away but easily accessible. The materials for these cabinets are typically wood or MDF with a finish that matches the rest of the kitchen—think matte white or soft wood tones. The appliances themselves are selected for their small footprints, such as a 24-inch dishwasher or a slimline oven, which integrate smoothly into the cabinetry.
To achieve this, measure your appliances carefully and consult with a carpenter or cabinetry specialist to design custom compartments. Choose appliances designed for built-in installation, and ensure proper ventilation and electrical connections are planned in advance. For a budget-conscious approach, opt for modular units with front panels that match your cabinetry, or use removable panels to access appliances when needed. This seamless integration results in a streamlined look that makes your small kitchen feel larger, more organized, and stylish.
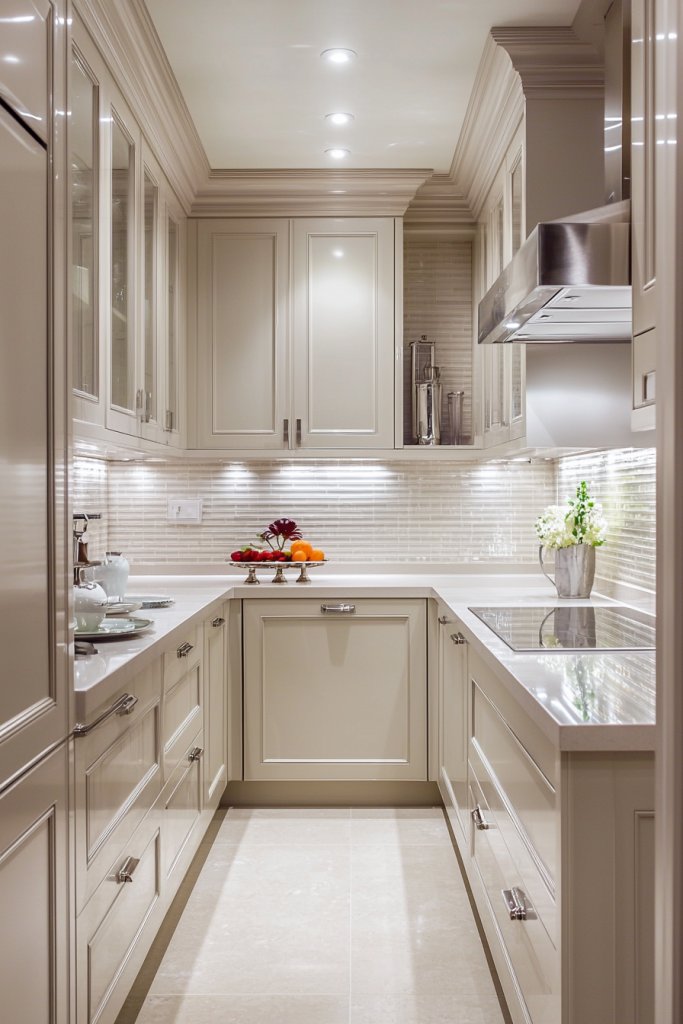
14. Design a U-Shaped Layout for Optimal Storage and Workflow
A U-shaped kitchen layout is a highly efficient design that maximizes storage and creates a natural work triangle, perfect for small spaces that need to pack in multiple functions without feeling cramped. By positioning counters and cabinets along three walls, this setup provides ample storage, prep areas, and easy access to everything you need while cooking or cleaning.
Imagine walking into a cozy kitchen where the three walls form a U shape, with sleek white cabinets, soft gray countertops, and under-cabinet lighting illuminating the workspace. The refrigerator is tucked into one corner, the stove and oven along the middle wall, and the sink beneath a window on the third side. This design creates multiple zones—prepping, cooking, cleaning—within a compact footprint. Open shelving or glass-front cabinets add visual interest while keeping essentials accessible, and a small island or breakfast bar can be added if space allows for casual dining or extra prep space.
To implement this, plan your measurements carefully to ensure sufficient clearance and work zone distances. Use modular cabinets and adjustable shelving to optimize storage, and consider incorporating pull-out drawers, lazy Susans, or corner carousels for hard-to-reach spots. Focus on choosing durable, space-efficient appliances and accessories that align with your style. With thoughtful planning and smart storage solutions, a U-shaped layout transforms a small kitchen into a highly functional, welcoming space that makes every inch count.
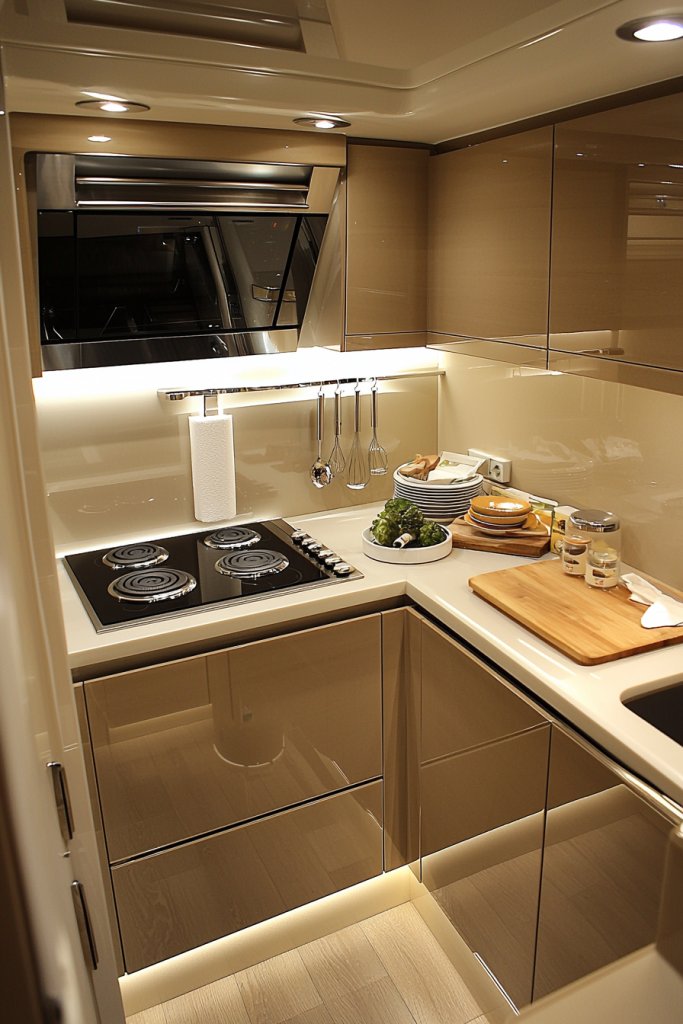
15. Use Light Colors and Reflective Surfaces to Enhance Space
Color choice and surface finishes play a crucial role in making a small kitchen feel larger and more open. Light, neutral tones—such as whites, creams, soft grays, and pastels—reflect more light and create an airy, spacious atmosphere. Pairing these with reflective surfaces like glossy cabinets, glass backsplashes, or polished countertops amplifies the effect, bouncing light around the room and reducing visual clutter.
Picture a kitchen with sleek, matte white cabinets paired with a glossy white subway tile backsplash and a quartz countertop that subtly reflects ambient light. The seamless, monochromatic color scheme creates a sense of continuity, making the space feel less segmented and more expansive. The reflective surfaces also add a touch of elegance and modernity, while soft, natural lighting enhances the overall brightness. Even small accents, like a chrome faucet or stainless steel handles, contribute to the reflective theme, elevating the aesthetic without overwhelming the senses.
To achieve this look, choose light-colored cabinetry and countertops made from materials like laminate, quartz, or acrylic with reflective finishes. Use high-gloss paint or lacquer on cabinets for extra shine. Incorporate large, well-placed windows and layered lighting—such as under-cabinet LED strips or pendant lights—to maximize brightness. By combining light hues with reflective surfaces, your small kitchen will feel more open, inviting, and effortlessly stylish.
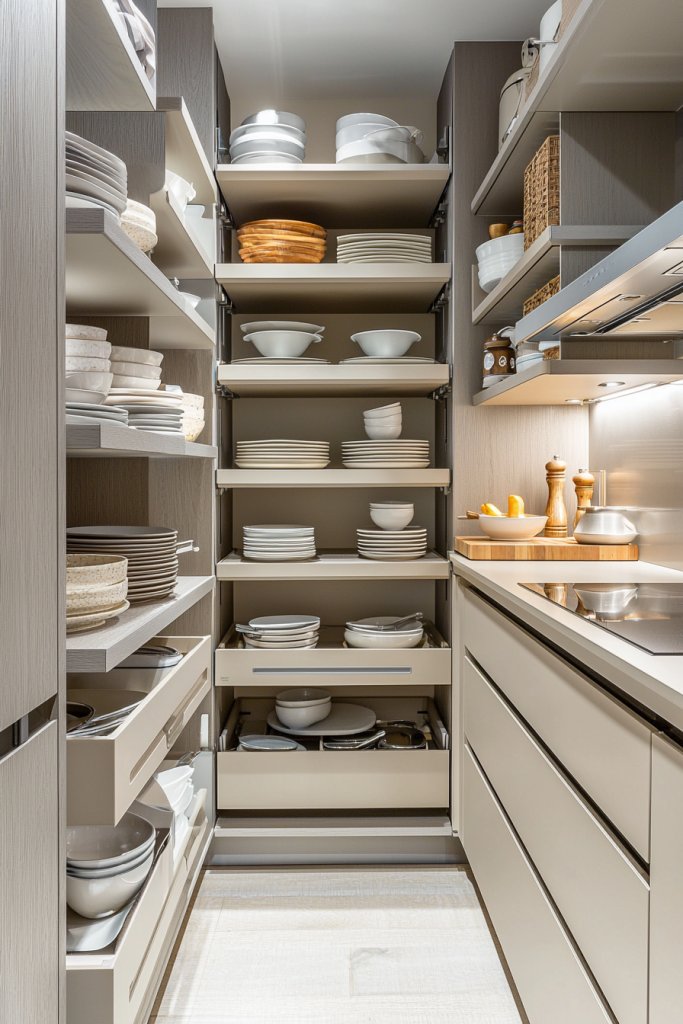
16. Incorporate a Pull-Out Pantry for Hidden Storage
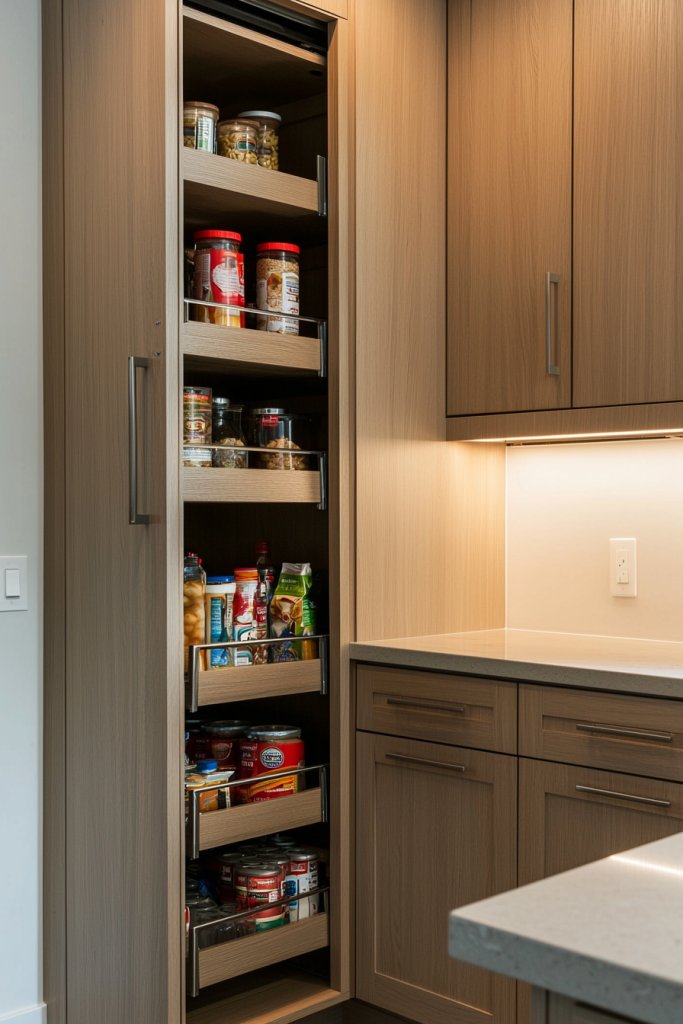
A pull-out pantry is a game-changer for small kitchens, offering sleek, hidden storage that keeps your space clutter-free and highly functional. This clever feature maximizes vertical space and transforms unused narrow gaps into efficient storage zones, making everything easily accessible without sacrificing style.
Imagine a slim cabinet with multiple narrow shelves that smoothly slide out, revealing rows of neatly organized spices, canned goods, or snacks. The interior is often lined with adjustable racks, allowing customization for different item sizes. The exterior blends seamlessly with surrounding cabinetry, often finished in the same material and color, creating a streamlined look. When closed, it remains unobtrusive, maintaining a clean aesthetic. The overall effect is a discreet, organized storage solution that feels both modern and practical, with a slight tactile satisfaction when pulling out the shelves.
To implement, start by measuring the width of narrow spaces or existing cabinet openings—generally around 12 to 18 inches wide is ideal. Purchase a pre-made pull-out pantry kit or have custom cabinetry built to fit your dimensions. Install the slides securely to the cabinet frame and add adjustable wire or wood shelves inside. You can opt for affordable options like metal racks from hardware stores or DIY with repurposed materials for a personalized touch. Finish by painting or veneering the exterior to match your kitchen’s decor. This project is beginner-friendly and can be completed in a few hours with basic tools, turning an awkward corner into highly efficient storage.
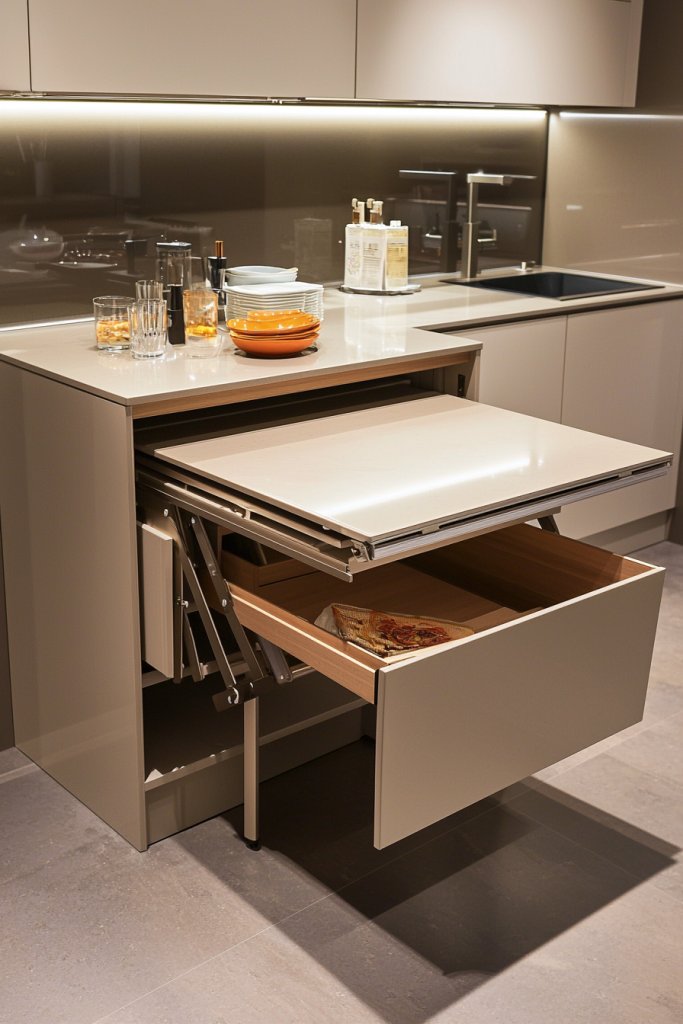
17. Install a Fold-Down Work Surface or Drop Leaf Table
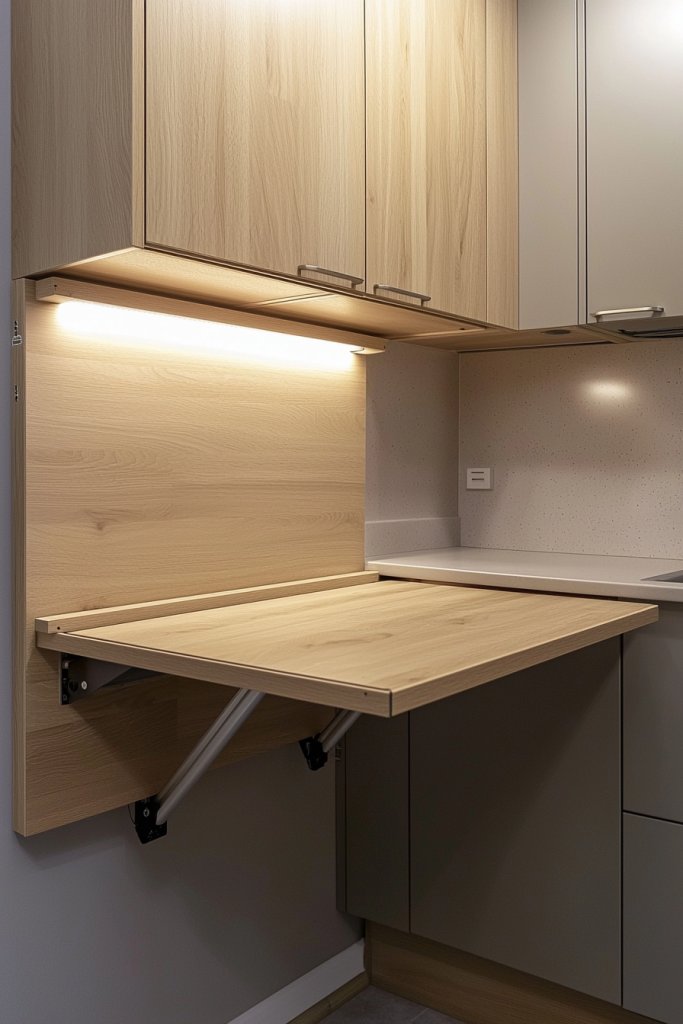
A fold-down work surface or drop leaf table is the perfect space-saver for small kitchens, providing a flexible area for cooking, dining, or prep work that can be tucked away when not in use. This innovative solution creates a multi-functional space that adapts to your needs without cluttering the room.
Visualize a sturdy wooden or laminate panel mounted on the wall with fold-away hinges, painted in a neutral tone like soft white or light gray to blend seamlessly into your cabinetry. When unfolded, it extends outward to offer a generous surface—think of a modest but practical work area with enough room for chopping vegetables or setting down dishes. When folded, it lies flat against the wall, revealing a sleek, minimalist surface that doubles as a decorative feature, perhaps topped with a textured ceramic vase or a colorful dish towel draped over the edge. The overall look is clean, versatile, and space-conscious, adding functionality without sacrificing style.
To set this up, choose a sturdy, lightweight material such as plywood, MDF, or a pre-made folding table, and attach it securely with heavy-duty hinges to a wall stud or solid surface. Use a level to ensure the work surface is perfectly horizontal. For a simple DIY project, purchase a ready-made fold-down table from home improvement stores and mount it following the included instructions. Finish with a coat of paint or laminate for durability. This fold-down feature is easy to operate, requiring just a gentle lift or fold, making it an ideal solution for small kitchens that need to maximize every inch.
18. Use Stackable or Modular Storage Solutions
Stackable and modular storage solutions offer customizable, space-efficient ways to organize your small kitchen, allowing you to adapt storage as your needs evolve. These versatile units help reduce clutter and make the most of vertical and horizontal space, making every inch count.
Picture a set of clear, stackable plastic containers or sleek stainless steel tins, neatly arranged on open shelves or inside cabinets. These containers come in various sizes, fitting snugly into corners or stacking vertically to free up countertop space. Modular units like cubed baskets or sliding drawers can be combined to suit your specific storage needs, whether for utensils, pantry items, or cookware. The coordinated look, often in neutral shades like white, gray, or black, creates a tidy, modern aesthetic that makes your kitchen appear larger and more organized. The tactile experience of opening a well-structured storage system adds to the satisfaction of a clutter-free space.
Getting started is simple: purchase a set of stackable containers or modular bins that fit your available space. Label each for easy identification, using chalkboard labels or adhesive tags for flexibility. Use adjustable shelving inserts or drawer dividers to customize storage heights. For an affordable DIY alternative, repurpose small cardboard boxes or baskets, stacking them inside existing cabinets. These solutions are beginner-friendly and provide an instant upgrade to your organization system, making daily routines smoother and more efficient.
19. Create Clear Zones for Cooking, Prep, and Cleaning
Designating distinct zones for cooking, prep, and cleaning transforms a compact kitchen into an organized, efficient space that minimizes clutter and movement. Clear zones help streamline your workflow, making cooking and cleaning more enjoyable and less stressful.
Visualize dividing your small kitchen into three main areas: a cooking zone near the stove with pots, utensils, and spices; a prep zone on a clear countertop with cutting boards, knives, and mixing bowls; and a cleaning zone near the sink with dish soap, brushes, and drying racks. Use subtle visual cues like different countertop materials or open shelving to separate these areas. Incorporate storage solutions such as wall-mounted hooks for utensils in the prep zone or a small rolling cart for cleaning supplies. The overall look is organized yet inviting, with each zone clearly defined by functional arrangement and aesthetic touches like matching containers or colorful towels that add personality.
To implement, start by decluttering your countertop and grouping related items together. Use small baskets or trays to contain utensils and cleaning tools. Install wall-mounted racks or magnetic strips near the prep and cooking zones for frequently used tools. Allocate a dedicated space under the sink or in nearby cabinets for cleaning supplies, keeping them out of sight but accessible. This zoning approach makes every task smoother, reduces cross-traffic, and creates a visually balanced kitchen that feels larger and more inviting.
20. Choose Compact Lighting Fixtures with a Modern Design
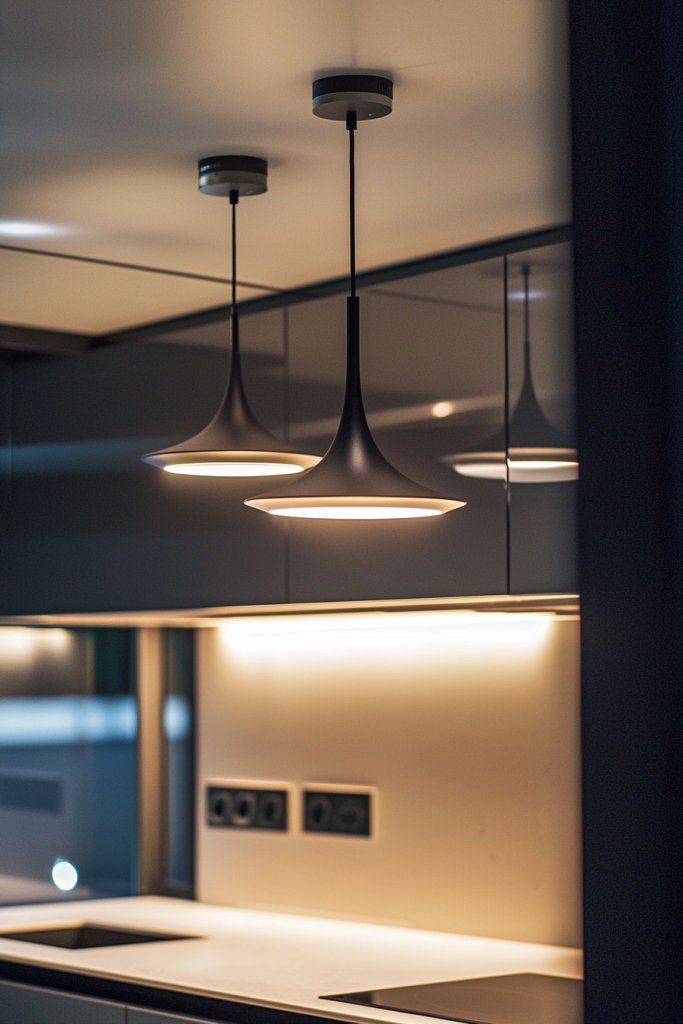
Smart, space-saving lighting fixtures are essential for small kitchens, providing ample brightness while maintaining a sleek, modern aesthetic. Proper lighting not only enhances visibility but also makes the space feel larger and more welcoming.
Picture a set of minimalist LED track lights or slim pendant fixtures with a matte black or brushed nickel finish hanging above your work areas. These fixtures emit bright, even light that highlights your countertops and cooking zones without overwhelming the space. Under-cabinet LED strips add a layer of task lighting, illuminating your workspace directly and reducing shadows. The combination of clean-lined fixtures and warm, natural light creates a cozy yet functional atmosphere that complements modern decor. The overall effect is a stylish, uncluttered ceiling, with lighting that feels integrated and unobtrusive.
To achieve this look, choose fixtures that are proportional to your ceiling height—sleek pendants or flush mounts are excellent options. Install LED strip lighting under cabinets or along shelves for additional task illumination—these are easy to cut to size and install with adhesive backing. Select energy-efficient bulbs and fixtures to save on electricity bills and reduce maintenance. This approach is beginner-friendly, requiring basic tools and minimal wiring, but the impact on your kitchen’s ambiance and functionality is significant. It’s a simple upgrade that elevates your entire small kitchen design.
21. Add Decorative Textiles and Non-Plant Accents
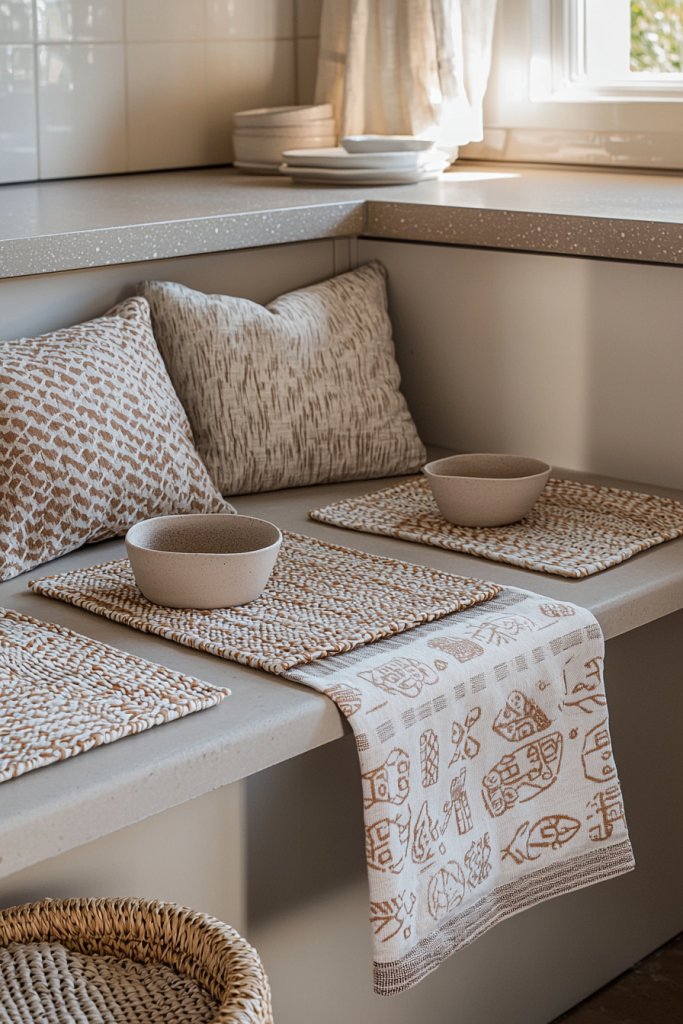
Adding decorative textiles and non-plant accents can instantly infuse warmth, personality, and visual interest into a small kitchen, transforming it from purely functional to inviting and stylish. These accents help soften hard surfaces and create a layered, cozy atmosphere that makes the space feel more like home.
Imagine a small kitchen with a vibrant, patterned rug in warm terracotta and navy hues that anchors the space, or a set of colorful, patterned dish towels hanging neatly on a sleek towel bar. Combine this with textured elements like a chunky knit potholder or a woven basket filled with neatly rolled kitchen cloths. Decorative ceramics, such as hand-painted bowls or vintage-inspired canisters, add charm and serve as both functional and aesthetic touches. These accents come together to create a lively yet balanced environment, with tactile textures that invite touch and visual appeal that catches the eye, all while complementing the overall design palette.
To incorporate these details, start by selecting a few key textiles—think a patterned runner or placemats in cheerful colors—and place them where they’re easily visible, like on the countertop or table. Add a couple of decorative ceramics or sculptures that reflect your style, such as a rustic ceramic jar or a modern geometric sculpture. Consider coordinating these accents with your existing color scheme to ensure harmony. Basic materials include woven rugs, dish towels, ceramic containers, and textured textiles; these are readily available at home goods stores or online. Keep it simple to avoid clutter—choose a few statement pieces that enhance the space without overwhelming it, and switch them out seasonally for fresh visual interest.
Conclusion
With a variety of smart storage solutions, space-saving furniture, and stylish design tips, these small kitchen layout ideas offer endless possibilities to maximize every inch of your space and boost functionality. Whether you choose sleek cabinetry, innovative appliances, or clever zone arrangements, you can transform your kitchen into a practical and inviting hub. Don’t be afraid to mix and match these ideas to create a personalized, efficient, and beautiful kitchen. Take action today and turn your small space into a standout culinary sanctuary!
Leave a Reply